
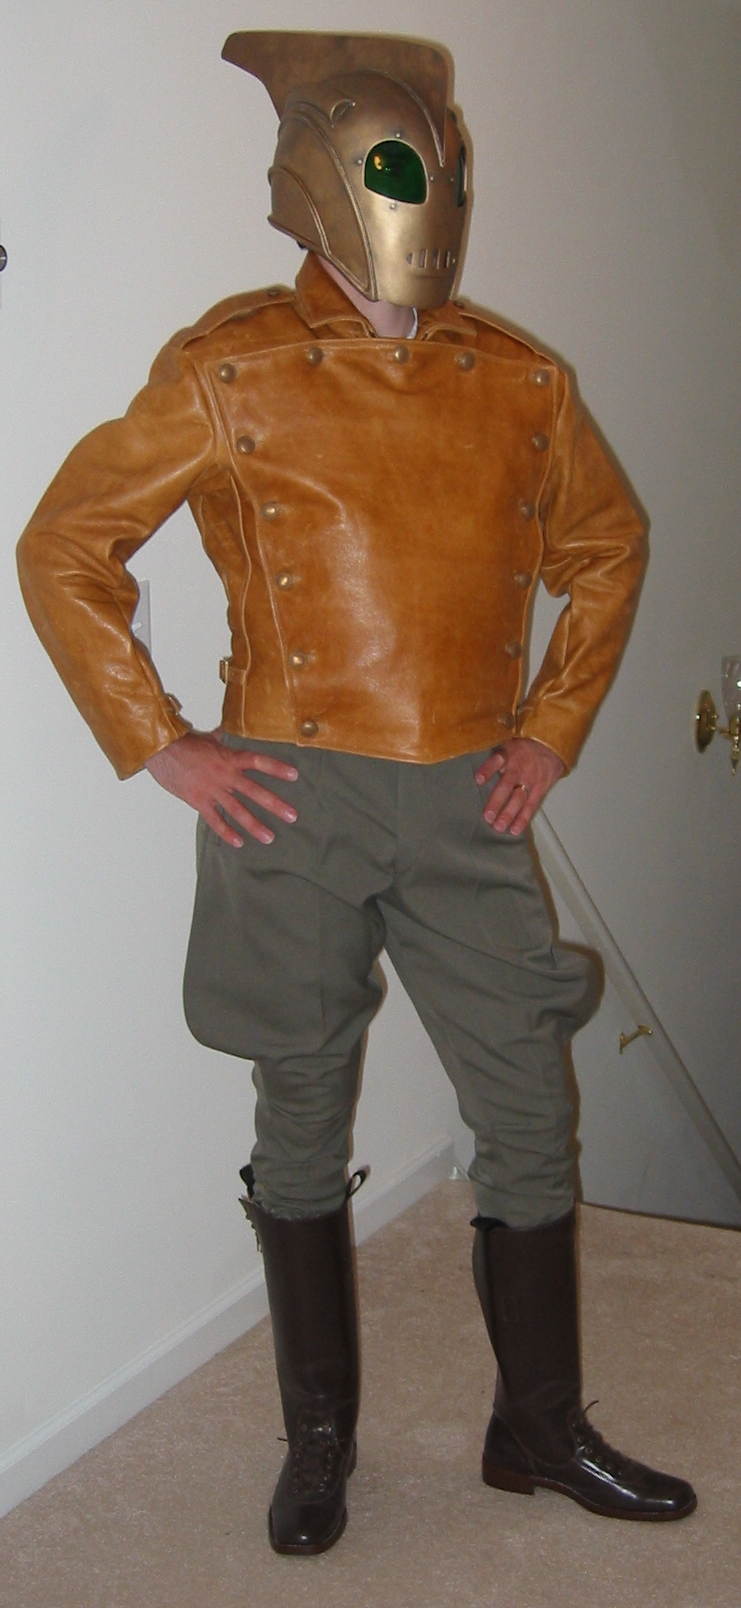
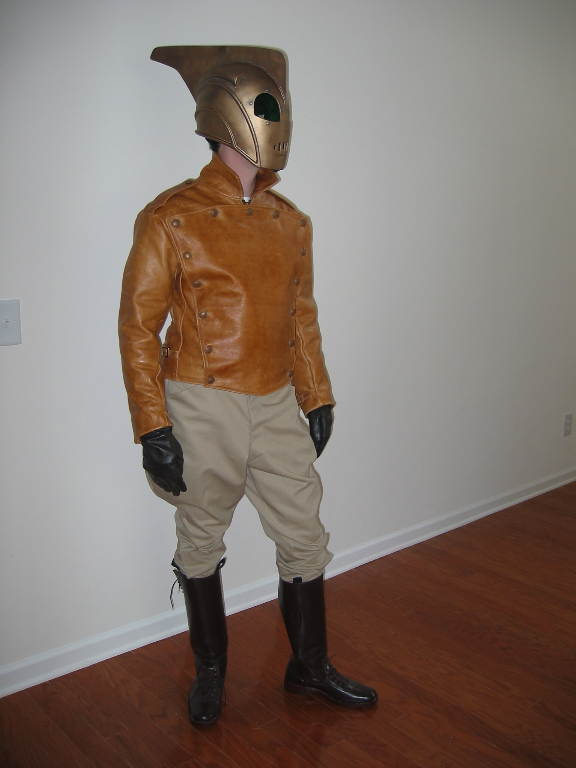
I decided a long time ago to make a Rocketeer costume. I've wanted to do this for ages, and I have finally gotten around to it. It took me a pretty darned long time, but I'm really pleased with the results. Enough so that in the pictures below, you'll notice I even got the movie-style haircut! I figure if you're going to do it, do it right!
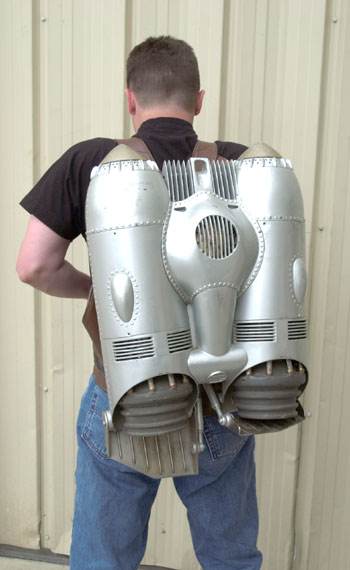
These are pictures of the finished costume. This web page is just to detail out what exactly went into making the jetpack. It was a much more complex project than you might expect, especially since I started with a cast of a pack - but going from a cast to a finished product isn't so simple!
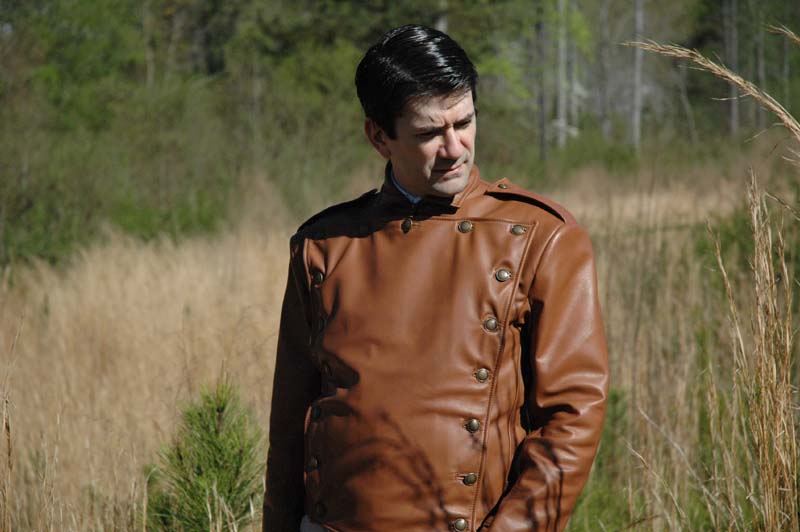
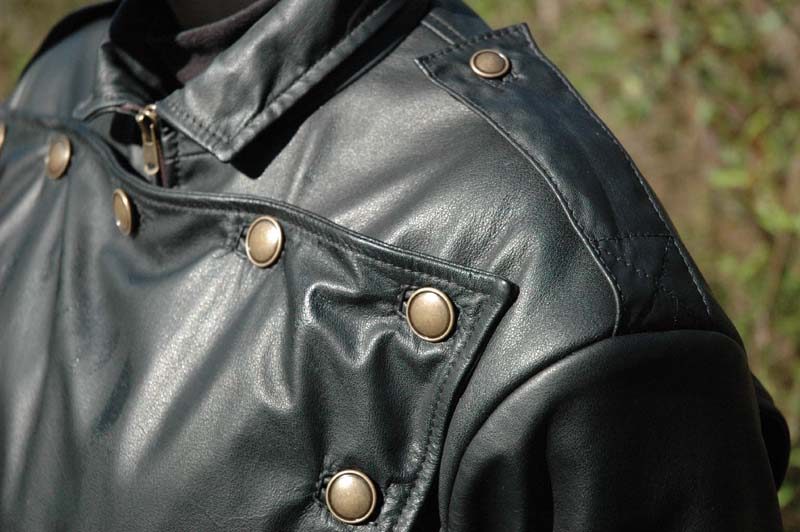
Abbyshot made my Rocketeer jacket. If you ask nicely they may make another one for you, it's an AWESOME coat. They even did one in black! Here's some pictures of it...it is really a wonderful coat. I'm really pleased it's available!


The Goal - this is a screen used pack Disney auctioned on Ebay. These are the pictures they used.
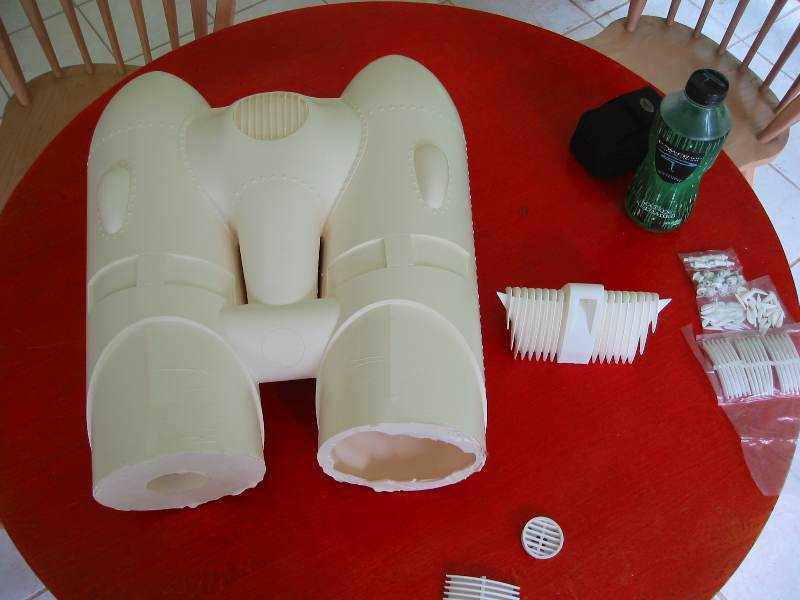
The starting point...it was terrifying to imagine cutting into this with a dremel.
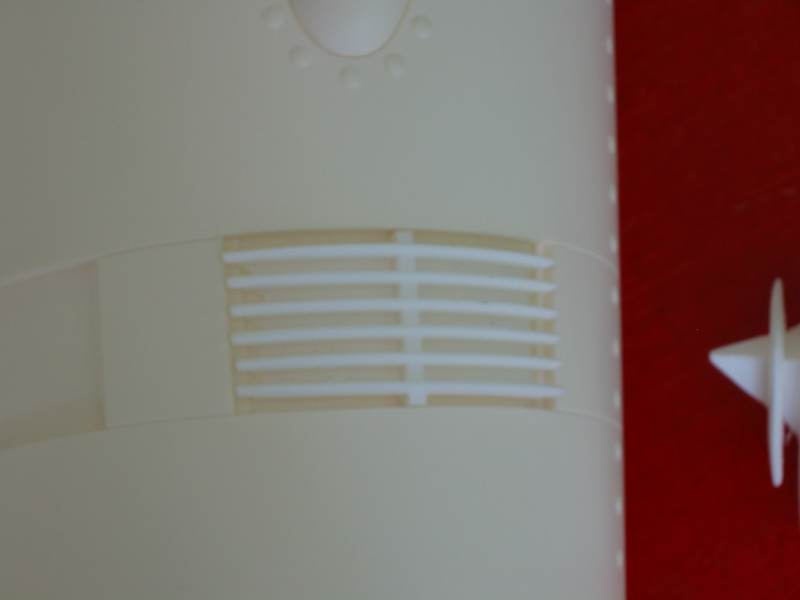
A close up of where a grill will go, with the grill lying in place.
This is how far I got before my dremel batteries gave out...
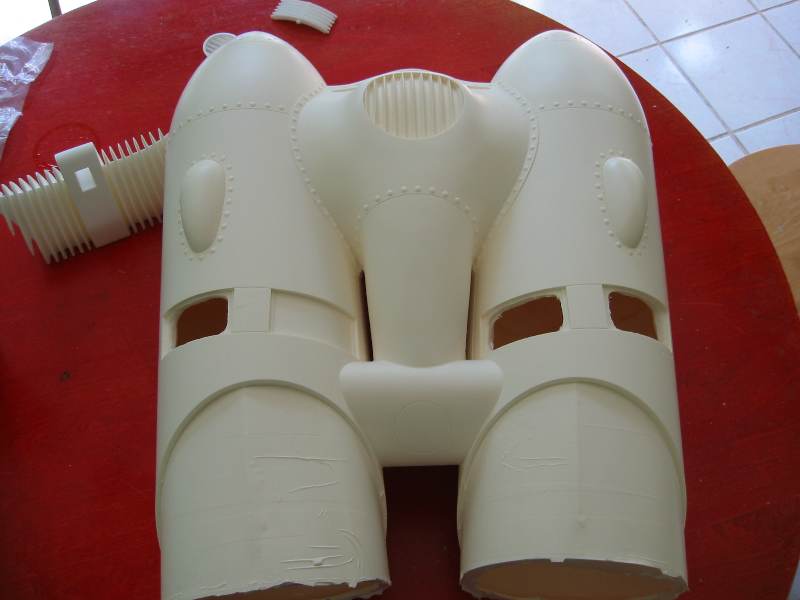
After more cutting...the grill areas are cut out, as is the small circular grill in the bottom.
I also cut out the top where the radiator goes...
and even test fitted the radiator! Whoo-hoo!
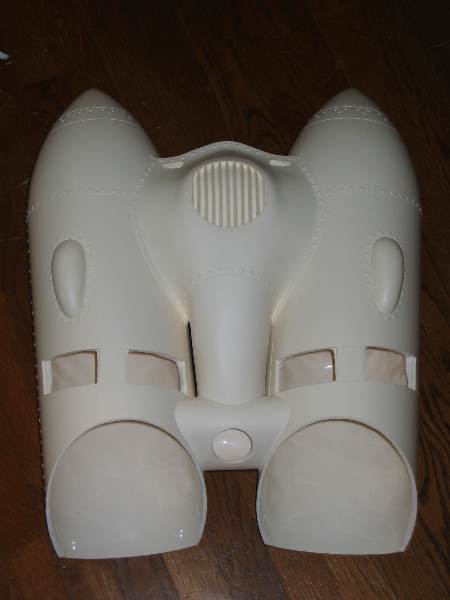
The last big cuts - the engine area at the bottom is now cut out.
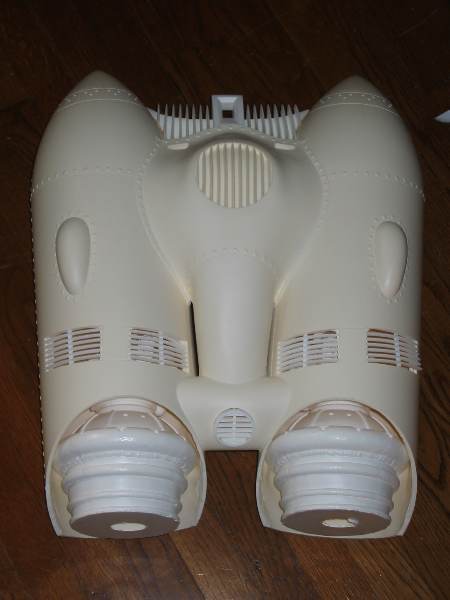
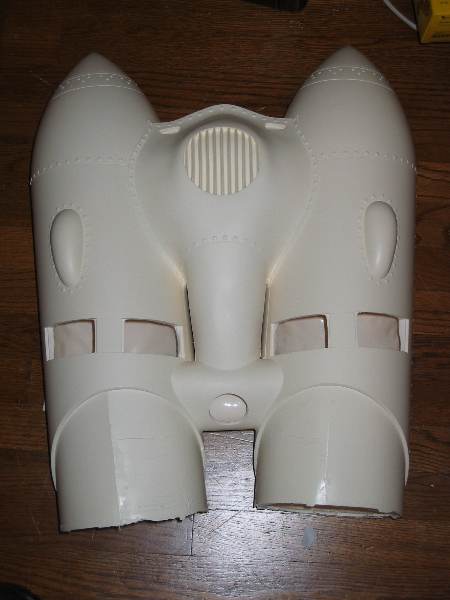
So I had to place the engines, radiator and grills in place...WHOO-HOO!
Friday June 27th, 2003
I decided to make this a journal...nothing worth taking pictures of today, but I was outside with my dremel again. I fitted the four grills around the engine today. They are actually numbered - once I figured that out, they fit MUCH better. :-) I also fitted the circular grill on the bottom center - that snaps in wonderfully now. This is probably the last of the dremelling unless I get a polishing bit for it to polish off the edges. Otherwise I'll get some fine sandpaper and do it by hand.
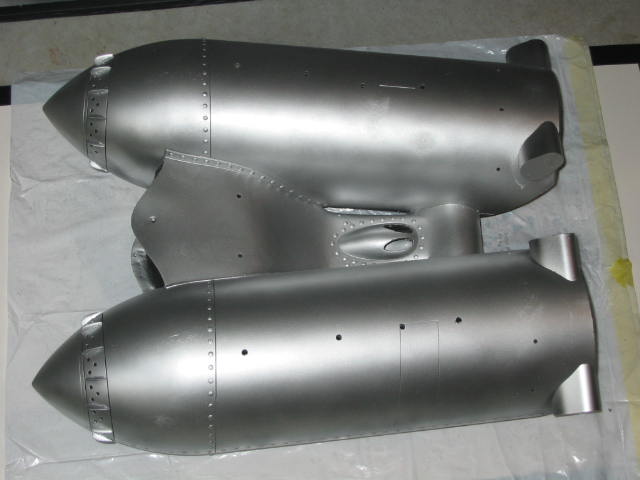
I also got a tip to paint this with Kylon Shortcuts silver spraypaint.
Saturday, June 28th, 2003
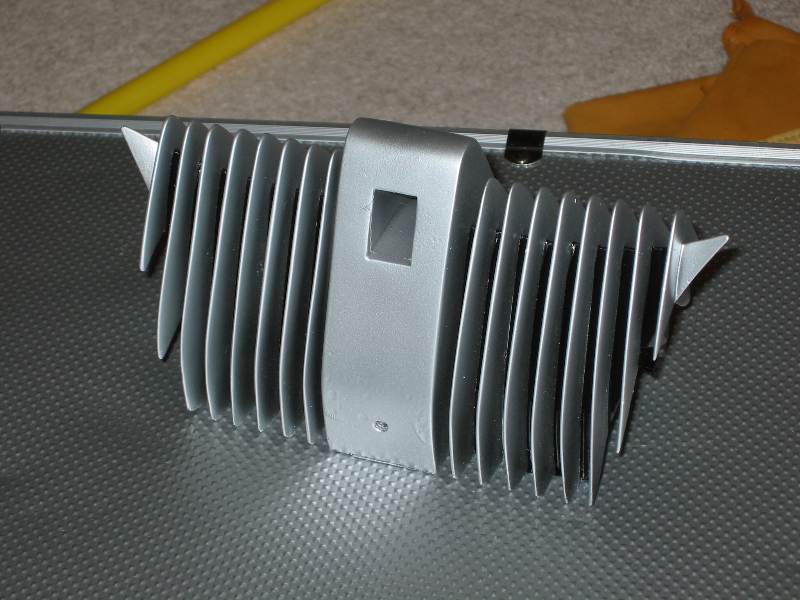
Well, spent some time filing the radiator and getting rid of flash marks. Not too exciting. Then I decided to fix one grill, which was misshapen.
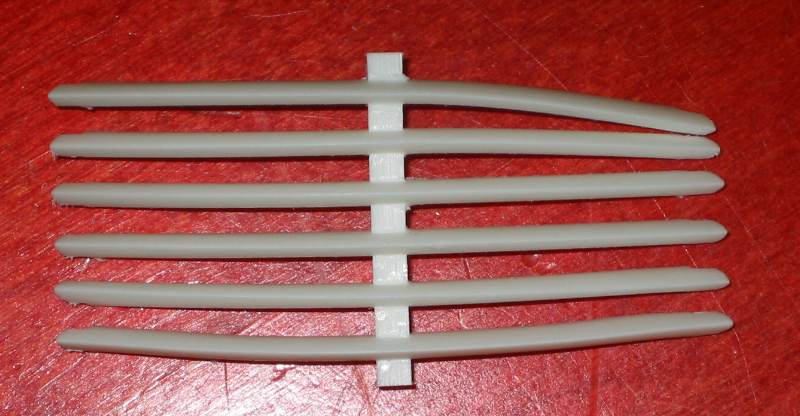
It'd been stored for a while, it probably got bent in storage. But how to fix it? I was given a suggestion of heating it, as that would soften the resin. I have a heat gun, so that was easily doable. That just left me worried that I'd heat it up, get it soft, and REALLY make it misshapen. So I made a little styrene shell to hold it. This is the not-yet reformed grill and the shell I made.

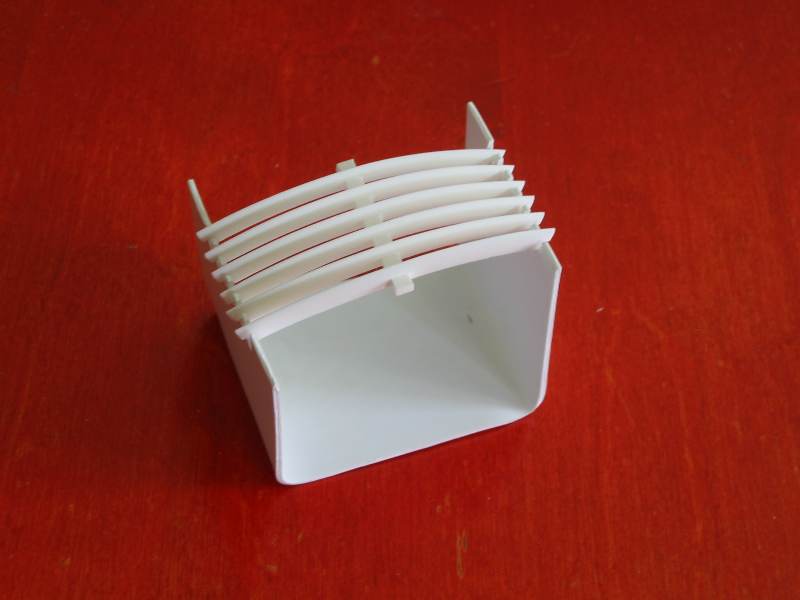
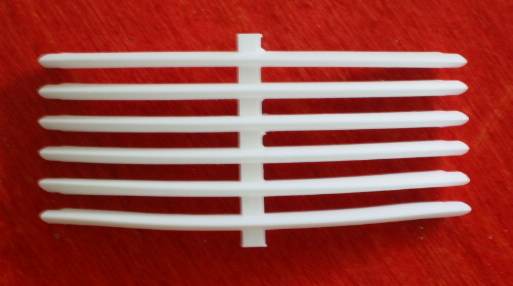
You can see the shell held it nicely with each leg the proper distance apart. So I went outside, hit the grill with the heat gun and was surprised to see the legs get very spaghetti like very quickly. Fortunately I was careful and just the bad leg got that loose, which was fine. I got it in the case, and it reformed nicely. I tinkered a bit more to make it a bit straighter and to remove a bit of warping, and it looks great!
Sunday, July 6th
Today I got ambitious and cut the circular grill that goes over the fan, and also the two detail pieces above it. I used the dremel to cut them out. This didn't work at all at first, there was too much resin dust. It went over the dremel bit and I couldn't see what I was cutting. So I got my air compressor and directed a stream of air on the router bit. That kept it clear so I could see what I was doing. The flying dust made me appreciate my safety goggles and filter mask though - that stuff is bad to breathe.
You can see it's still quite rough, but successfully cut. I didn't want to get too close with the bit, too easy to mess up. I'll clean it up using sandpaper. Here's hoping my plan for that works!
Thursday, Jan 1st, 2004
OK, I'm finally working on this again. Took a break for Dragon Con and to build a vacuum forming table. That's now working quite well, and it's time to pick the jetpack back up.
First, I got the fan for the jetpack. The fan I got was found by Bob Lindenmayer - it's a airbrush compressor fan. I emailed info@speedysprayer.com and got a fan for the HS201 compressor. The part number was 204RB2074, and it cost me $5.70. Shipping was another 6.50 though. Check for pricing as I have no idea when it'll change.
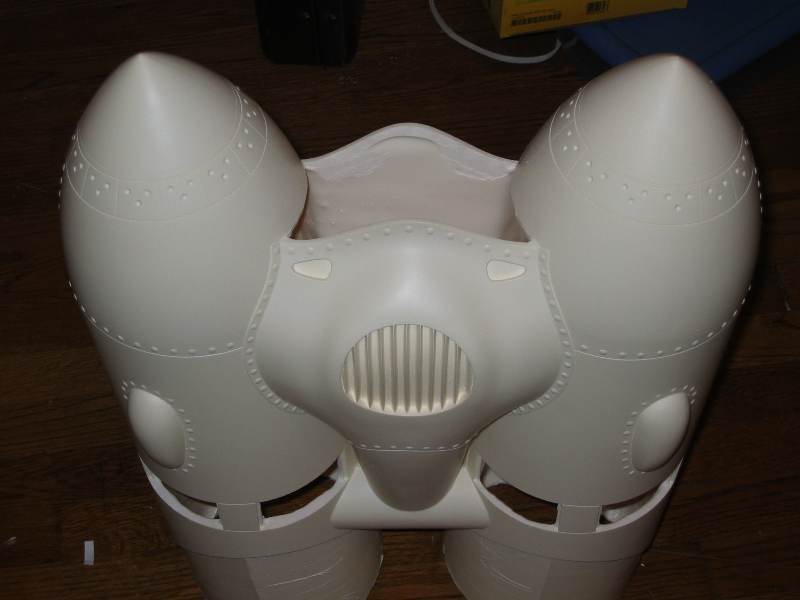
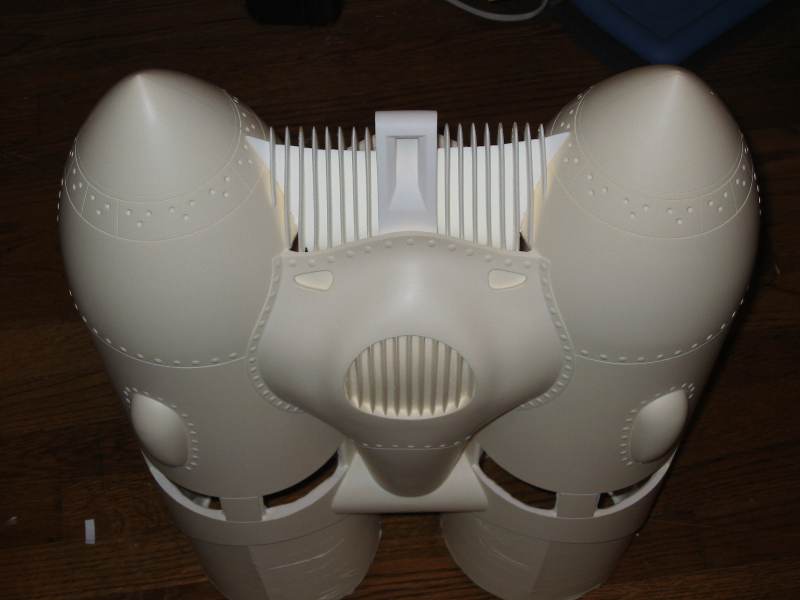
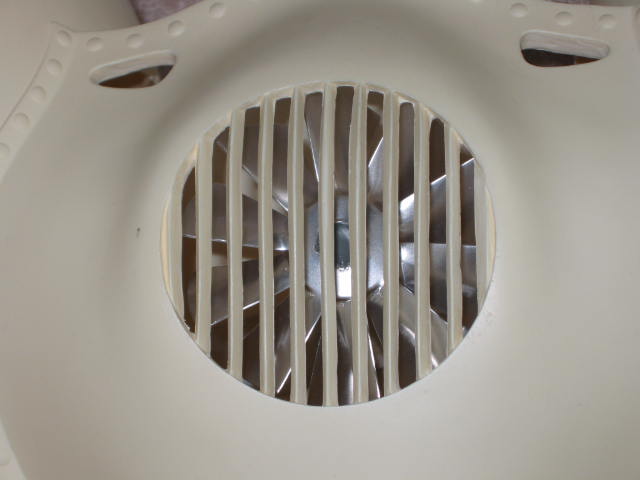
So anyway. I have a fan. This is where I noticed how THICK the jetpack is again. This is a good thing...but I could barely see the fan. The bars in front of the fan were still quite thick. This is all just me being obsessive, but I had to thin the bars down.
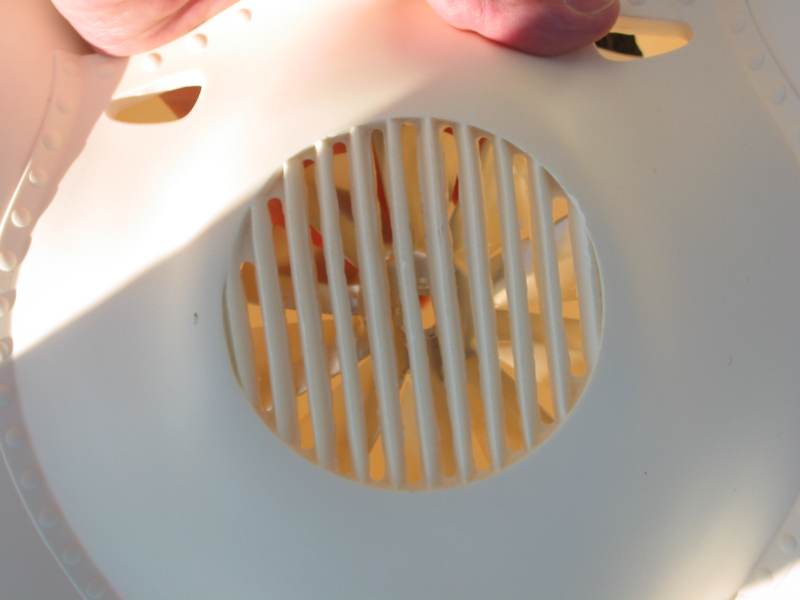
You can see the thickness a bit...not too well as it's dead on and not at an angle, but hey. So this took a while to figure out. How do you get a dremel in there? I found a good way eventually. I used a thick router bit (thick is relative...maybe a quarter inch across?) I put the dremel entirely inside the jetpack at a 90 degree angle to the cuts, and I could then have good control of the dremel and clean off one side of each bar. I just had my hand through the opening for the radiator. I then reversed the jetpack, so the dremel could reach the other side of the bars. It did a pretty good job I think. Here's a picture of both sides of the fan opening.
Now I still have to file and sandpaper the inside to clean it up, but I'm pretty pleased so far.
Sunday, Jan 4th
No pictures for this step, but I finished sanding and filing the fan opening. I also went around to the square grill openings and cleaned them up. There is a bit of a seam down the side, so I used a polishing wheel on my dremel and sandpaper and smoothed down the seam, although I think I might have to smooth it down more to make it disappear.
Tuesday, Jan 6th
I ordered flaps today...yay! I also have some more information about extra parts, and thought I'd add that while it's in front of me.
There are push rods attached to the flaps. To do those, you need 1/4 inch aluminum rods and a die to tap the end (that puts screws on it so that you can screw it in to something.) I know hardware stores carry those, as I track them down I'll add more info.
The next parts can be ordered from http://www.mcmaster.com/ and part numbers are listed.
The push rod should end in a fitting, which is part number 8405K311.
The hose I've had recommended was stainless steel hose, part number 5394K15. It's evidently a bit difficult to work with...other hose that's painted can work, but this sounds quite interesting. You'll need 6 to 12 feet I'm told. --NOTE-- I found this hose to be black and not right for the pack. You'll have to read on to see what I end up using. I think the part number I was given wasn't what was intended.
The ends of the hose are put in compression fittings, part number 50915K614. Those are packs of 10, you'll need one for each end of the hose. The hose tends to unravel, so you'll probably want a fitting on both ends to keep it from coming apart. Note that I ended up using a different size...again, read below (around July.)
I'm moving soon so I'm not sure when I'll be ordering all this and fitting it together, but hopefully it won't be TOO long.
Sunday, Feb. 29th
Well, I ordered a bunch of stuff and used most of it today. It's been a fun day.
First, I worked on the flaps. They came with little metal rods. I had to consult several reference pictures before I figured out what this was. The flaps have grooves routed in them. The real jetpack has ridges. I cut the metal rods to fit the grooves, and presto! Ridges!
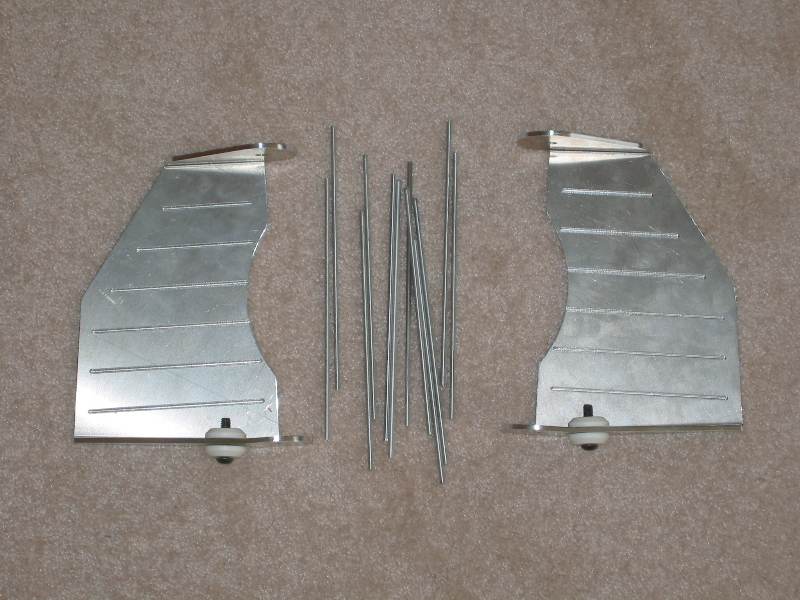
I still need to file the edges of the rods down, but that can wait - don't have a good tool to do it. I need a metal filing bit for my dremel or my drill press I think.
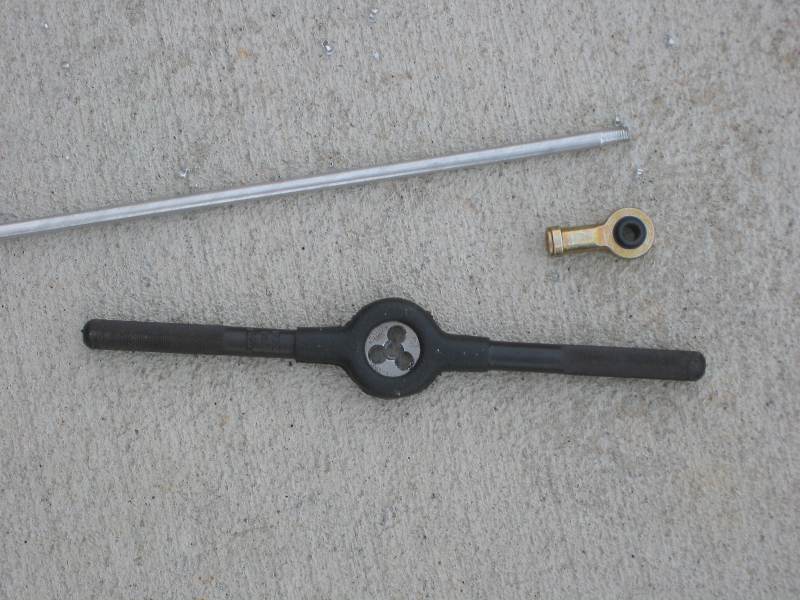
The flaps, when attached, have rods on the insides. They connect using ball joint rod ends - 8405K311 from McMaster Carr. The rod is a 1/4 rod - I used part number 88615K21 as it was soft enough to thread. See, the ball joint rod ends are threaded on the inside but the rod isn't. I thought about just getting a smaller rod and gluing it in, but what the hell. I bought two more parts from McMaster Carr - 2602A62 and 2577A21. Those fit together to make the black item in the picture below. This was pretty cool, actually. You sort of screw it onto the aluminum rod and it cuts a thread into it. Then you can screw the aluminum rod into the ball joint rod ends quite nicely. I had to hold the rod with a wrench - make sure you hold the wrench back far enough that you won't scar any aluminum that will show - and my first attempt didn't work but I figured it out from there. It cuts from one side so make sure you get the right side...not really sure how to tell you which side cuts, but it only works one way.
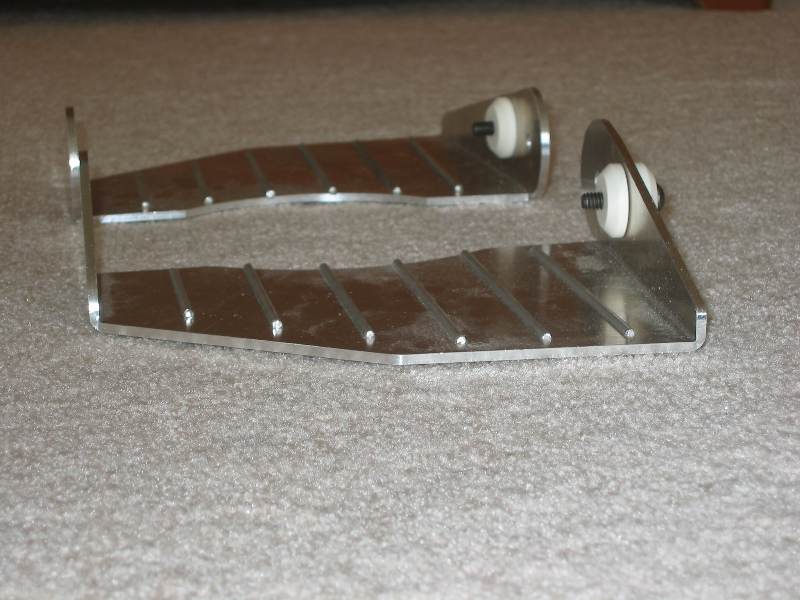
Now I fit that part onto the flaps and ...

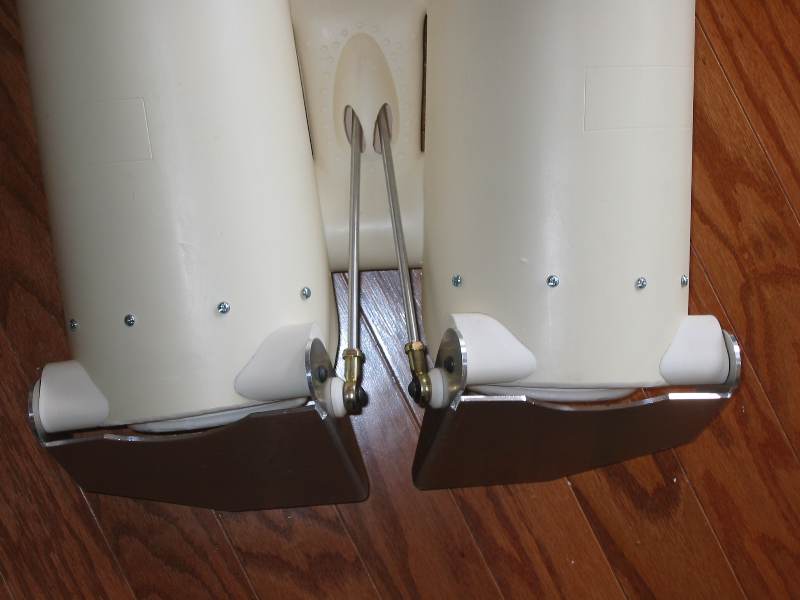
Oooo looking good! Note in that picture that I also screwed into the flaps the connectors that hold the flaps to the jetpack. The connectors are the resin parts on the metal flaps. I screwed them in to the flaps, and then held the flaps to the pack until I found a spot where they fit and allowed the flaps to open and shut. To help with this I rounded the back bottom edge of the pack a bit - the flaps scraped as they opened and shut, so rounding it helped a lot. I found a place where they both fit, and after much thought I hot glued them in place to make sure they wouldn't hit each other. This was very fortunate...they didn't hit each other, but they weren't symmetrical either. So I popped one free and repositioned it until they were symmetrical.
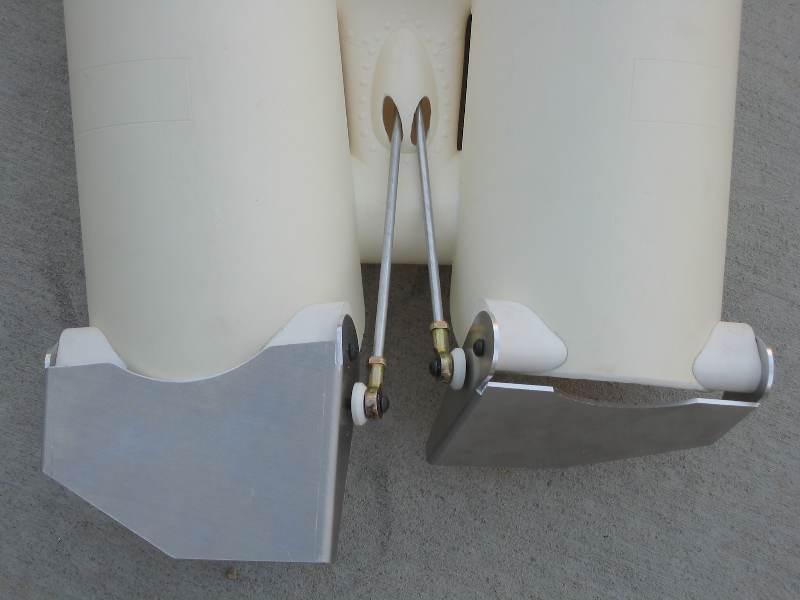
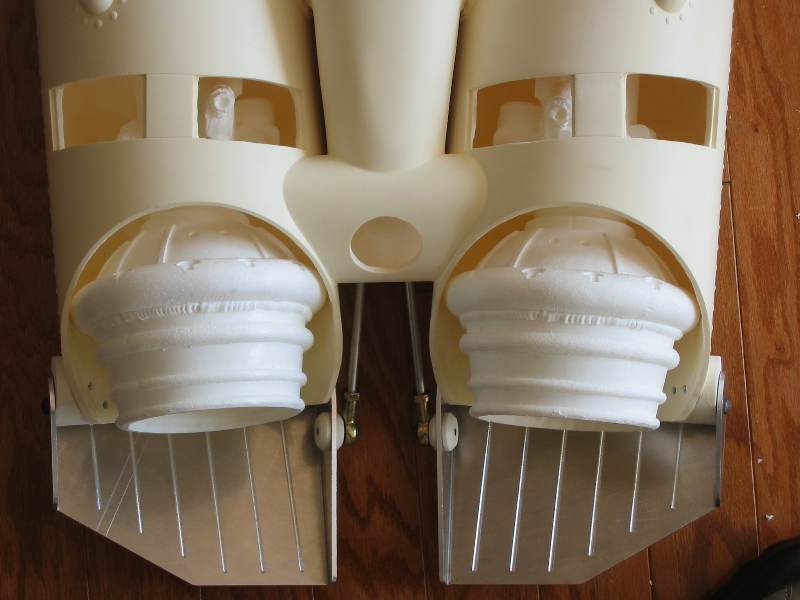
I had one difficulty that is worth passing along. Note the two tear drops that are drilled open for the rods to slide in and out (my rods are about ten inches from the tip of the ball joint to the end of the rod, by the way...enough so that the edges inside the pack won't accidentally come out and also won't hit the inside anywhere.) I had a lot of trouble with one flap as the rod sort of wedged between the bottom and the top of the tear drop. After much playing and some widening of the tear drop, I found that if I moved the flap further towards the edge of the pack, the rod won't catch on the tear drop. So make sure you tinker with the flap positioning. What seemed to work best is moving the flap as far to the edge as you can without going past where the curve for the engine cut out starts.
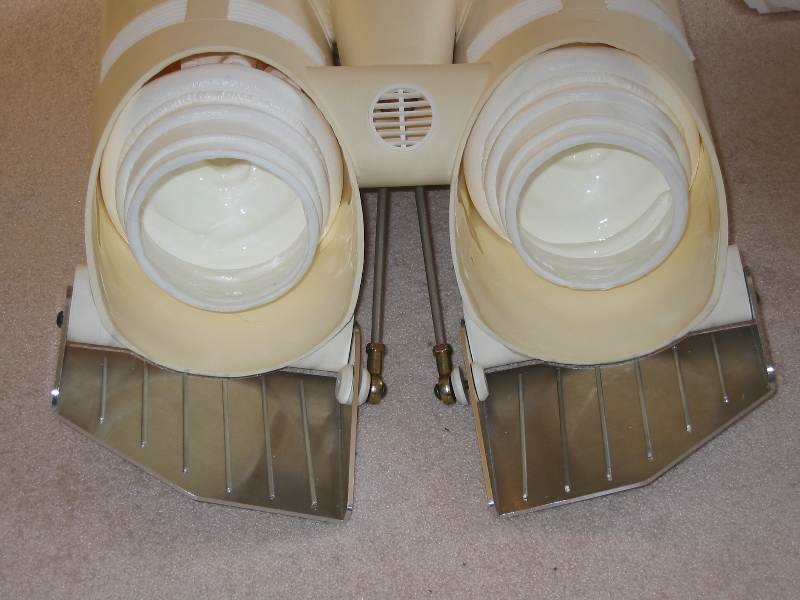
Here's my current pack bottom...you can see I also cleared the engine nozzles. The flap connectors are still hot glued - I think I want to screw them in place, but I didn't have any screws that seemed fitting for this - most of them were too long. My current plan is to screw them in, countersink the heads just a bit, and bondo over them so it will still be smooth. I'll need some putty for the cracks around where the connectors meet the pack as well, as that isn't flush.
Gotta be careful though...I can't spray paint with the flaps attached, but I do want to spray paint with the connectors attached so that will all be smooth and matching. So I want to permanently attach the connectors, then remove the flaps.
Monday, March 1st
Mostly detail work. I rounded the tips of the rods that fit onto the flaps with my dremel tool. They're OK but not great. David Smith wrote and suggested putting the rods in my drill press and then using a metal file...gonna try that tomorrow and see if that makes them better!
I marked where the flap connectors were with a pencil and pulled them off. The hot glue lifted them up just a bit, so that there was a gap. I scraped off all the glue, and screwed them in with some #4 3/4 inch wood screws. That seems to be holding them very well.
David Smith had another suggestion that I wish I'd read before I attached them - he suggested putting some adhesive backed sandpaper on the pack and then rubbing the connectors over the attached sandpaper. This would sand them down just a bit so that they would fit very snugly. I thought that was worth passing along. Although I have to say I looked at mine to see if there were any gaps large enough to make me want to unscrew them, and they do actually fit pretty well. I think the gaps I saw earlier were all due to the hot glue. (The screws I used seem to have a tendency to strip...so I don't plan to unscrew this any more than I have to!)
I drilled a hole for the screw and a slightly larger hole for the screw head. Some heads fit flush, some are still a bit raised. Gonna have to think on that...I'd really like them all flush so I can bondo over them and leave the inside of the pack smooth. I think I'm going to end up taking out the non-flush screws and making the hole for the head bigger.
Saturday, March 6th
Well, lots of work that when you are done no one can really tell you did much.
I started by deepening the screw holes so the heads are embedded a bit. That went well, now I just need bondo to cover the holes with. I played with positioning the flaps a bit, they cannot lie flat as they do in reference shots. Dave Smith turned up a bit of information that the tie rods in the screen used shots are bent to allow them to lie flat. I finally decided my flaps were OK the way they were, although I wish they did lie flat.
I mounted the engines to the back wall of the jetpack with four screws. I used round head screws that sit up a bit. I didn't want to drill the screw heads into the pack as I didn't want to weaken that wall - I had fears of the heads ripping through or something. Since these four screws do hold weight I wanted them as strong as possible. And while the screw heads sit up, it's behind the pack and no one can see them.
Then I superglued the hose connectors in place and painted the engines...

I'm not to pleased with the hose I have. My hose is black, and while the texture is right, the screen used hoses are grey or silver. I want that as otherwise I'll have black on black. And the compression fittings are small...this might be correct, but getting the hose in them is tough!
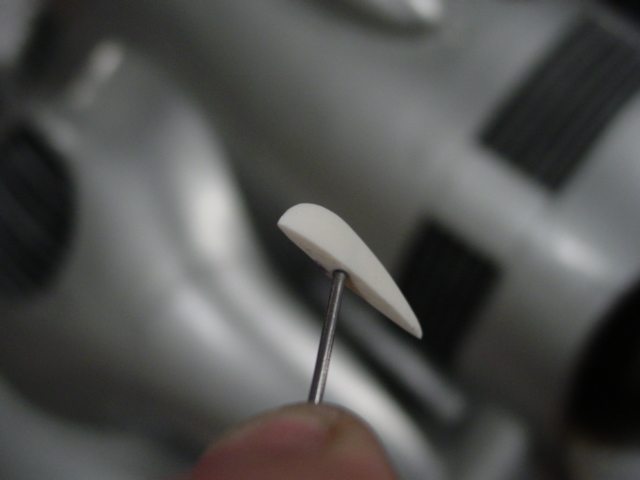
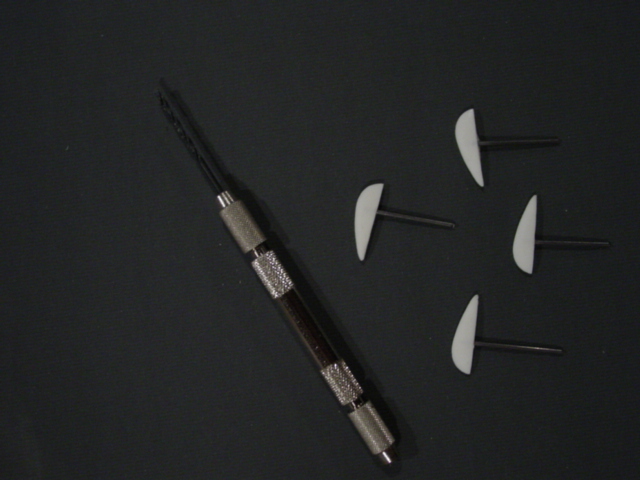
I got a tip from Bob Lindenmayer about the finlets. He suggested pinning them, which means drilling a hole in them using a hand drill, and putting some wire in that hole. Then you put the other end of the wire through a matching hole in the tip of the jetpack. This holds them a lot more securely than just gluing them in place. I plan to do this tomorrow.
Sunday, March 7th
I put bondo in the screw holes that hold the flaps in place...there are mounds now instead of dents. I see sanding in my near future...
I also hand drilled all the finlets. They are so small that it really did need a hand drill - any motorized one could slip a millimeter and go right through it. Now I just have to drill matching holes in the jetpack (I'm OK drilling those with a dremel, it's much less fragile!) and mount the finlets. Although there are some scratches in the nozzle tips I need to sand out first.
And I touched up the spray paint on the engines. I will paint a bit more detail on them and gloss coat them in the next few days.
After that I just have to paint everything and glue it together...
well...
except that I want to mount the fan to a motor and mount that so it'll spin when I hit a button. And it needs to be accessible so I'm thinking I will need to make the radiator removable so I can replace the batteries or fix it. And I'm not sure how to do that yet.
Oh, and the hose for the engines. I need to find better hose.
Friday, April 9
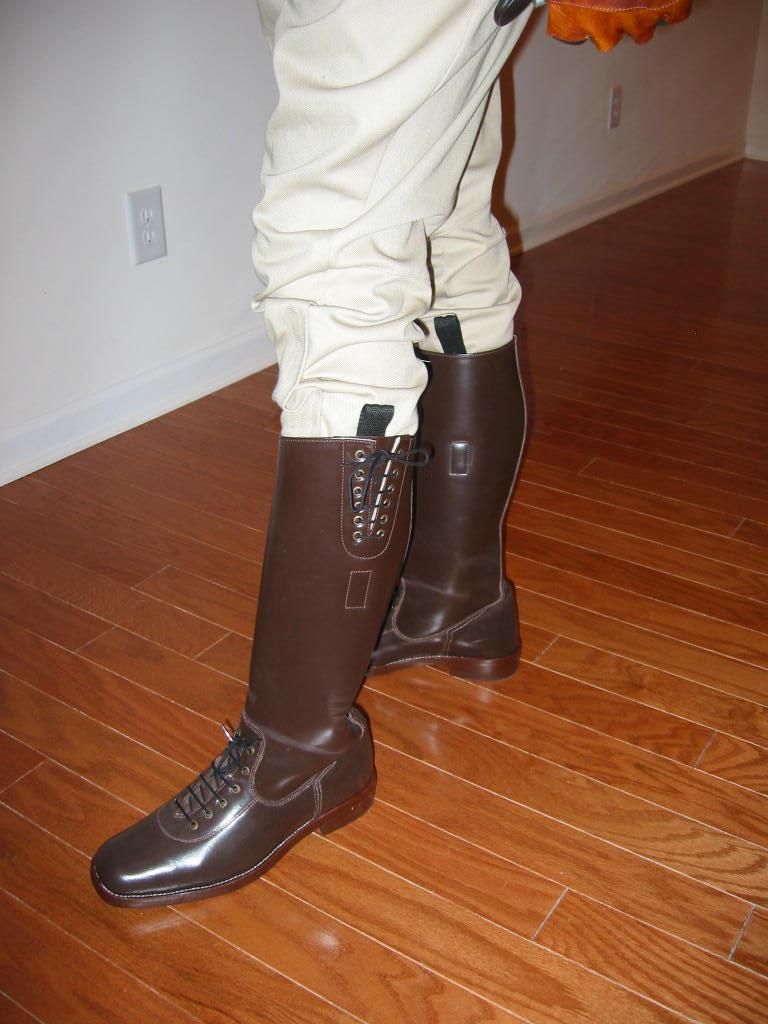
Still looking for a proper electric engine to turn the fan. So no pack progress. But I did get the boots - click here for more info on getting boots.
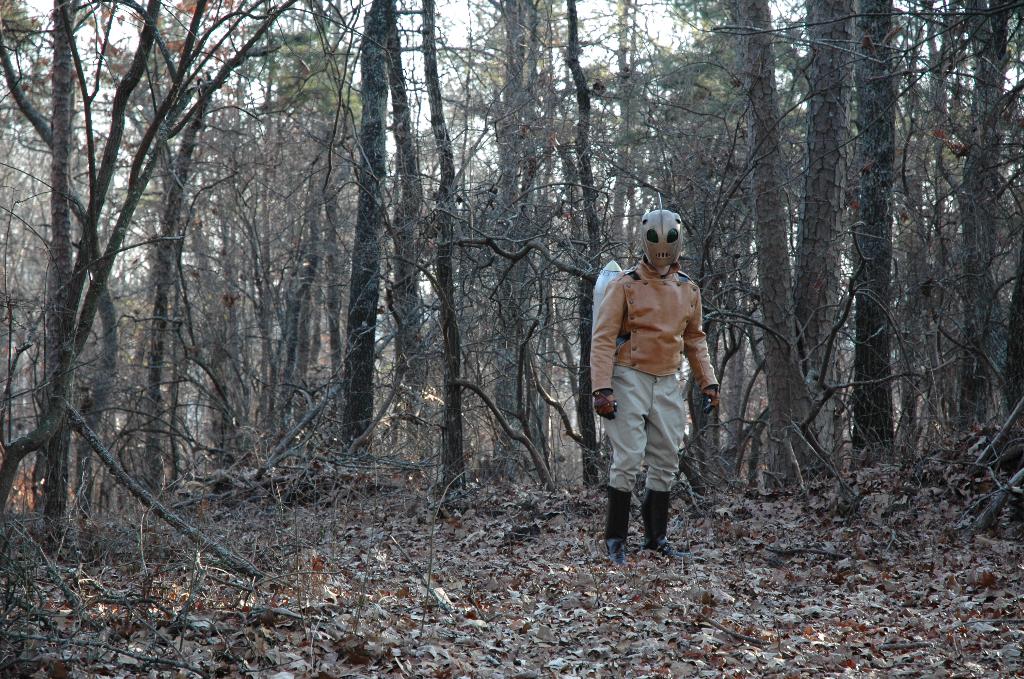
Also, here's some pictures of my helmet. I assembled it from a kit, then Rob Steel painted it for me (doing a VASTLY better job than I could have done - thanks, Rob!)
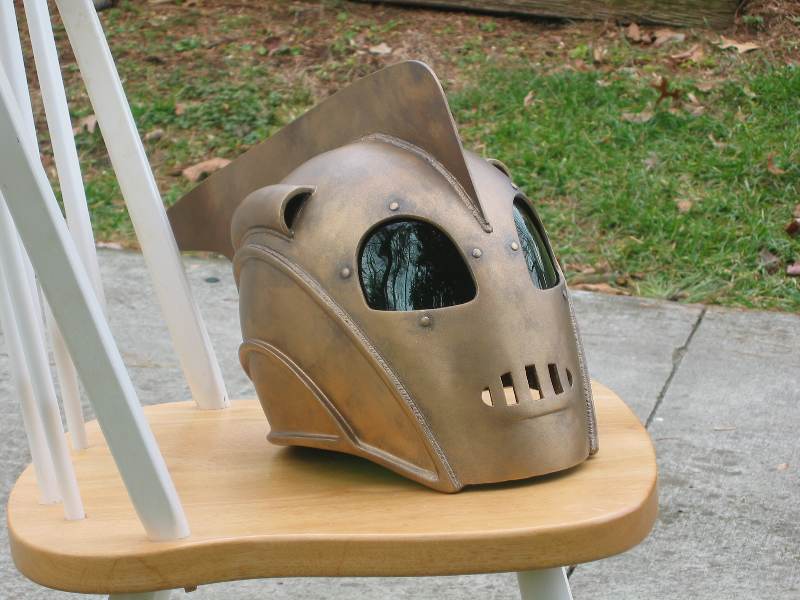
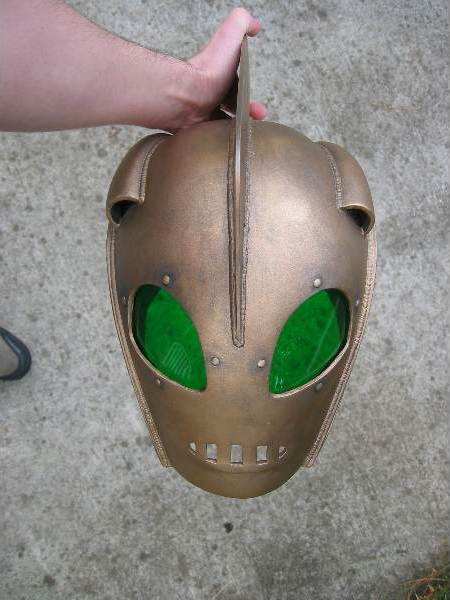
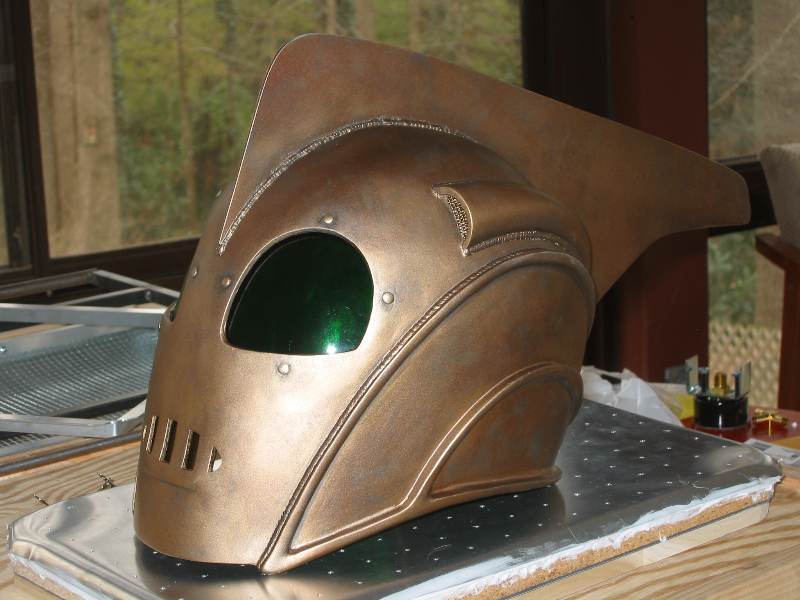
I've been going for the movie version of the Rocketeer, so I should have dark smoked lenses. But I really loved the comic style green lenses, so I went with those. Interestingly, with the helmet on, they look like the smoked lenses. You just get a green tint to them. I really love it.
Anyway, more jetpack news once I've got a electric engine - I do have one, just not one I like. I've got the leather to make the harness and will work on that this weekend. I want to get the harness and motor done next - then assembly and then painting!
Sunday, May 9
Got the fan mounted. There's progress once again!
I spent some time thinking about this and trying to find a motor. I finally ended up with a motor from Radio Shack. It had two flattened sides which I thought was good (I wasn't sure how to hold on to a round motor, it seemed like it'd spin!) and a larger spindle. Still not large enough to fit the hole in the center of the fan, but larger than most tiny spindles I saw.
So first I had to design a mounting system. I ended up making one out of metal. I figured it'd stay and be invisible when you looked at the fan through the jetpack. So I essentially cut out a rectangle of metal and rolled it into a tube around the motor. Then I cut out two sides of it near the bottom (just a bit of the two sides) and folded the other two sides out to make legs. That also let me control the height - if it was too tall, I could just cut out a bit more.
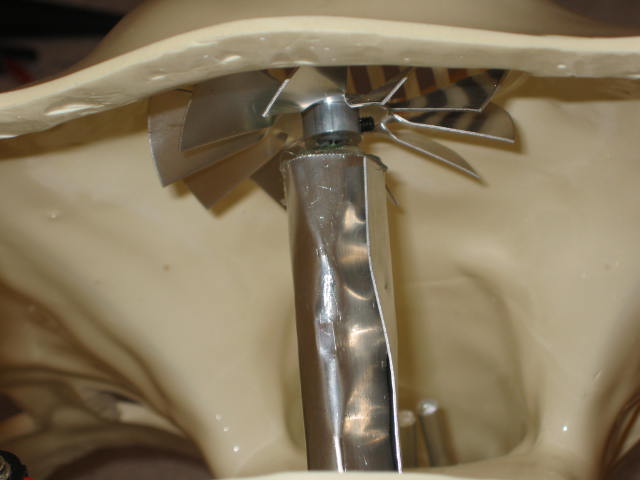

I then glued the motor to the fan. I pushed the motor through a paper bowl so it would stay. Then a few bits of wood on the bowl that held the fan in place and put on some JBWeld. I put on a bit of JBWeld and then kept watching it as it dripped down a bit. I cleaned that up while it was wet so no problem as long as you monitor it. Then that dried JBWeld gave me enough of a base to fill in the rest of the fan center with JBWeld. Hopefully this will hold!
I then drilled two holes in the legs, marked two matching holes in the jetpack while holding the fan in place, drilled them out, and bolted it in!
Note...this is a big piece to lift in through the radiator. I could, but it was easier to lift it in through the engine area.
Wednesday, May 12
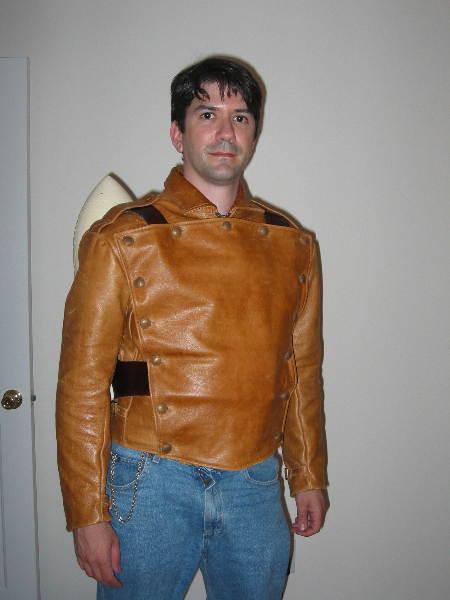
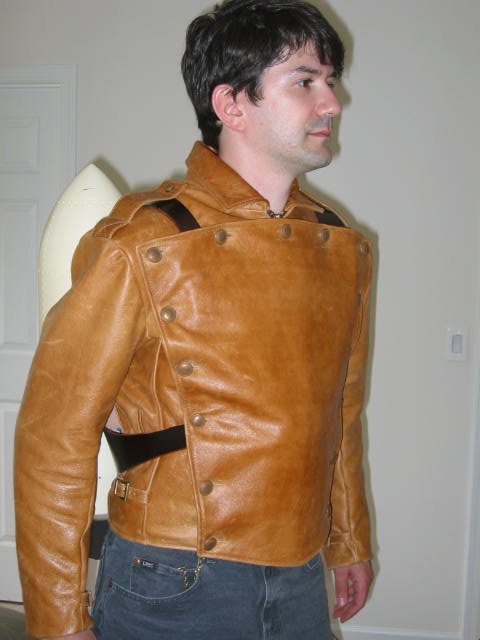
Got a jacket...what else can I say...
(I know the pants are all wrong, but better ones will come soon!)
Friday, May 14
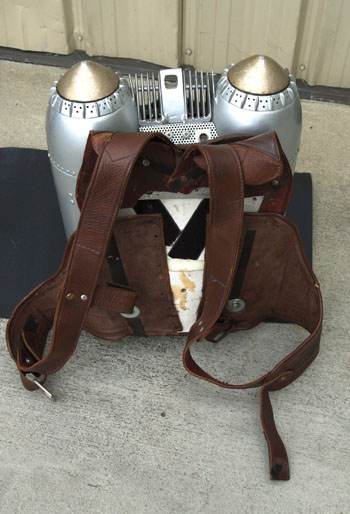
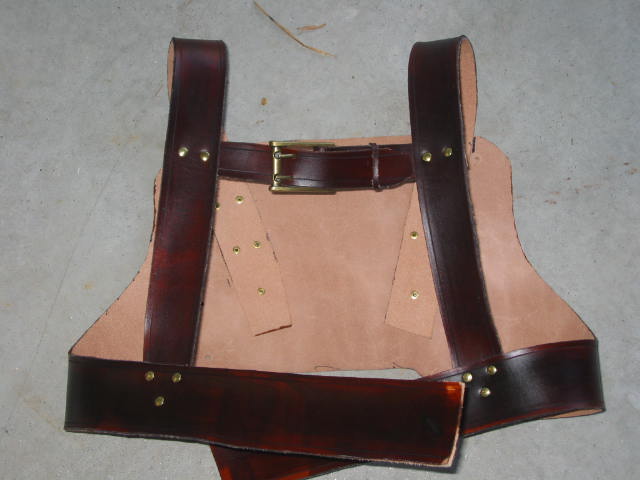
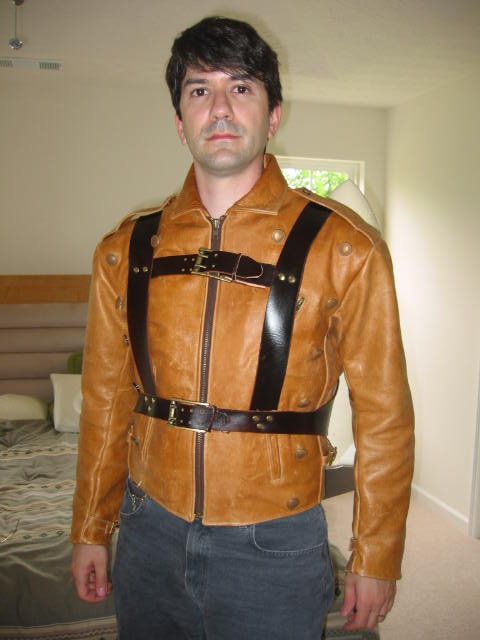
Time to start the harness...I took a close look at some pictures of the harness. Oh my GOD that thing is complex. I had no idea. The harness pictured at the top here is a rough stunt harness and it's complex, the finished hero ones are insane. I'd love to get one made, but financially speaking I might have to put that off until after Dragon Con, where I plan to debut this costume. So...time to design my own harness! I hate to cut corners, but...what the heck.
So, my amazing wife came to the rescue since she sews, and here we have Stunt Harness 1, made of a nice pink fabric with little white hearts.

That gets the general shape down. I've got a roll of thick leather, next step is to cut that out of the leather. Then attach belt blanks for the remaining shoulder harness parts...
Tuesday, May 18
I cut the harness out of leather and have it attached (mostly) to the jetpack. I cut out the shoulder straps but haven't attached them yet. I figured I'd just cut the straps instead of buying belt blanks. It's so close to wearable it hurts...
Sunday, May 23
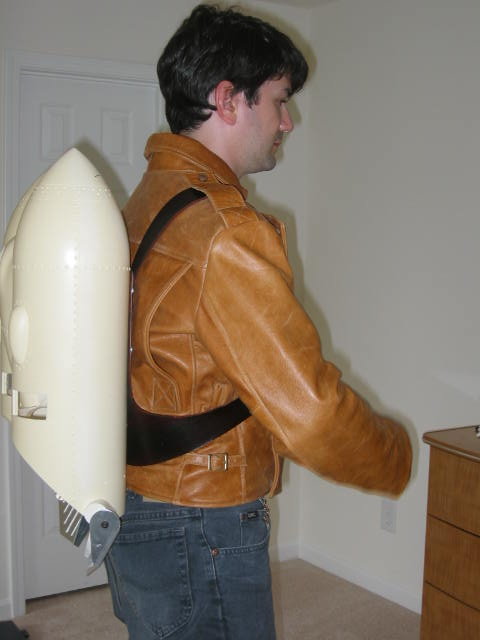
Oooo I have a harness!
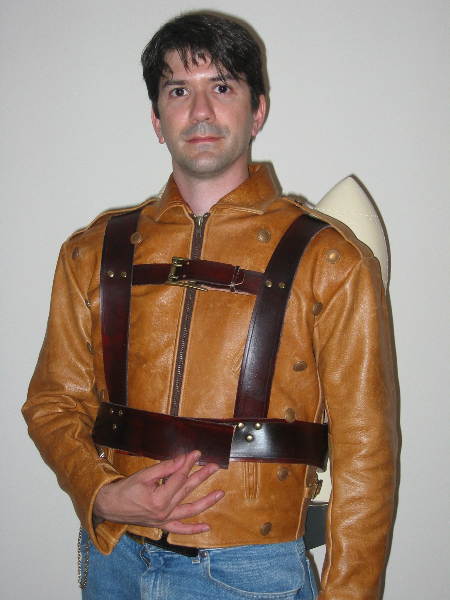
You can see a few problems still, it isn't quite ready yet. First off, I cut the lower stomach strap pretty wide, and I can't find a belt buckle that wide. So I'm holding it together, it's not buckled (which is why you can see that strap so clearly in the bib of the jacket when I've got it on.) Secondly, it's cut a bit too high and is pushing against the upper button.
SO...guess I'm gonna drill those rivets back out, and cut the upper side of the strap down until it's the same width as the upper chest strap. Then I can use the same buckle and I think that'll fix everything.
Well...too much harness is showing from the back. I think I'm gonna cut the sides down too.
And I'm worried about the rough leather scuffing the jacket...so I'm gonna line the inside with suede to make it smoother. So still lots to be done...but I've now worn the jetpack!! I'm so excited.
Monday, May 31
I've been working on the harness a lot. I finished it, scrapped it, and finished a second one. The first one worked, but by the time I figured out how to make it so that it held the jetpack without sliding, it wasn't acceptable to me anymore - too much fixing it to make it fit better. So I cut a second one. It's better, but still ...
The problem is not huge but it's there. Check out that first picture. You can see a bulge where the buckle sits across my stomach. It's not huge, but I'm not happy about it. I am considering cutting off the leather square with the buckles and replacing it with nylon. Some of the hero harnesses in the movie did that, for the same reason I suspect - you can get quick release buckles for the nylon straps that are much lower profile, and therefore won't have that bulge.
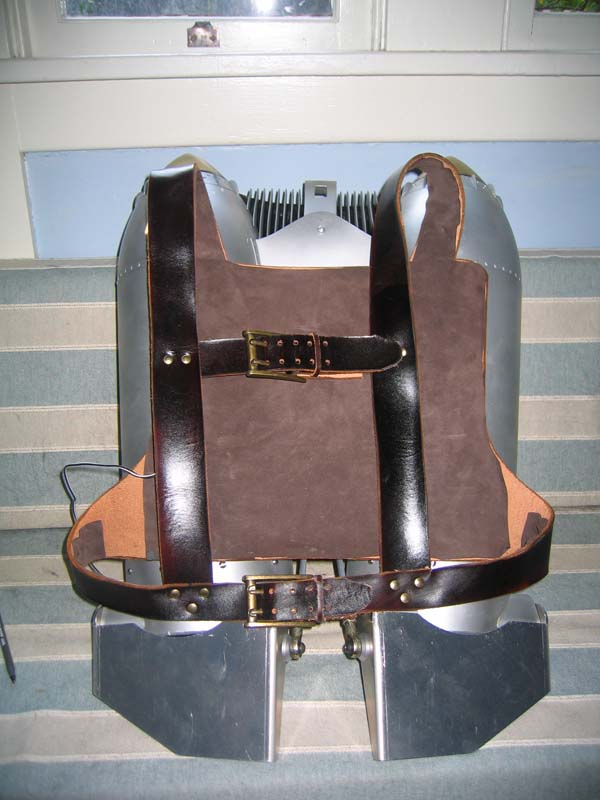
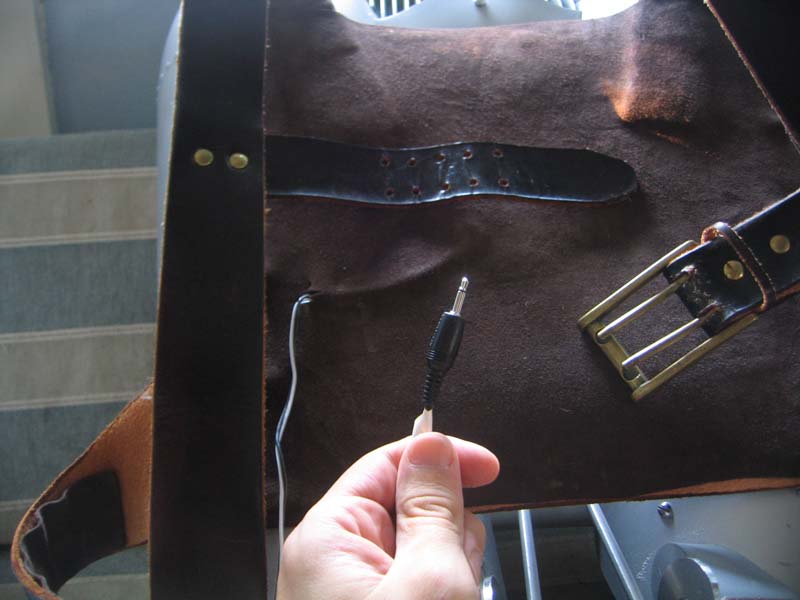
Two more harness pictures showing the back. It's now lined with suede, and you can see how I ran the power line to power the fan. The square part of the harness is 13 inches high and 12 inches wide, and the strap at the sides is 3.5 inches high when it comes off the back, and tapers to a smaller belt. I played with how it sits - if the lower buckle sits below my rib cage, the pack stays in place and the bulge doesn't happen at all. Still, it makes me think that velcroing the straps instead of using a buckle might be a good idea.
So we'll see. This works, at least. Next...paint the pack, gloves, and the control button...and maybe redo the harness again!
Thursday, June 10
I've been painting the jetpack lately...it's starting to look like a jetpack!
You can tell I finally decided at the last minute to drill out the holes between the finlets...I'm glad I did, it looks great. My friend Rich is in from New York - he has a Jango Fett costume. He gave me some advice known to the Fett guys but not me - evidently it's best to let the chrome dry for three days before handling (I used Krylon Short Cuts Chrome.) He says for a few days it'll take fingerprints. Better safe than sorry...I painted the back and I'm ignoring it for a few more days.
Painting the back gave me some practice and it's a good thing as a few spots are slightly messed up. However, they will be completely covered by the harness, so I'm not worried about sanding them out (I sanded one spot out of the base coat of black I laid down, but you can't see that any more.) Lesson learned, and I will do better on the front.
On another note...my pants arrived! They were custom made by American Import Export Ltd. They came too large, but Bob (the guy I worked with at AIEL) was VERY friendly, had me send them right back, and now they fit perfectly. I'm just DELIGHTED!
Gotta find a better pose though... :-)
Friday, June 25
Well, the pack is STILL getting painted. I've not been putting it off or anything, though I'm letting it dry three days between coats as advised just in case. But let's just say that painting this pack is a unholy nightmare.

You can see on the picture on the right where the gold nozzle is still horrible. I'm totally split between sanding the whole tip clean or calling it good enough. But I've already lost and had to retouch some silver paint due to working with the nozzles so much...I'm really leaning towards saying the hell with it and putting some gloss coat on it. I'm afraid if I keep working on it the problem area will grow.
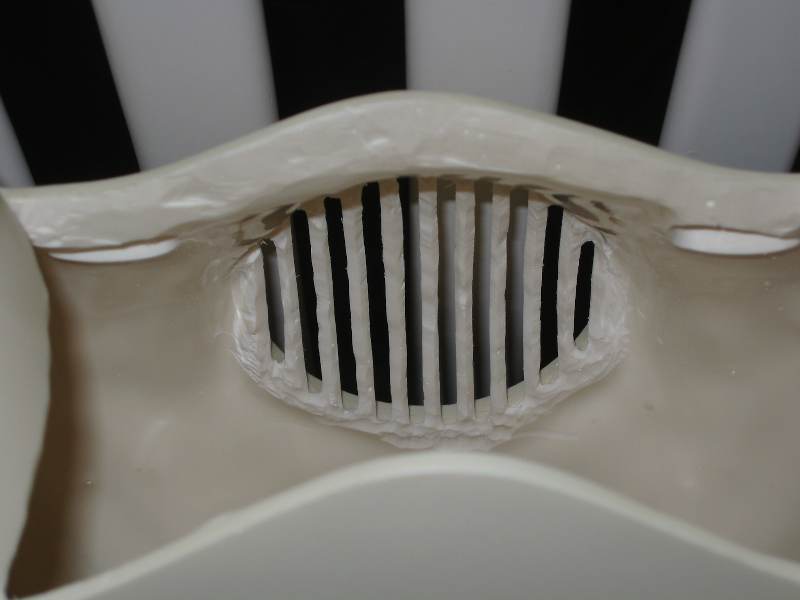
The radiator was no problem. This is the one I was EXPECTING trouble with. I base coated it black, put down some silver, then a gloss coat, and finally pin striping for the black areas.
Tuesday, July 27
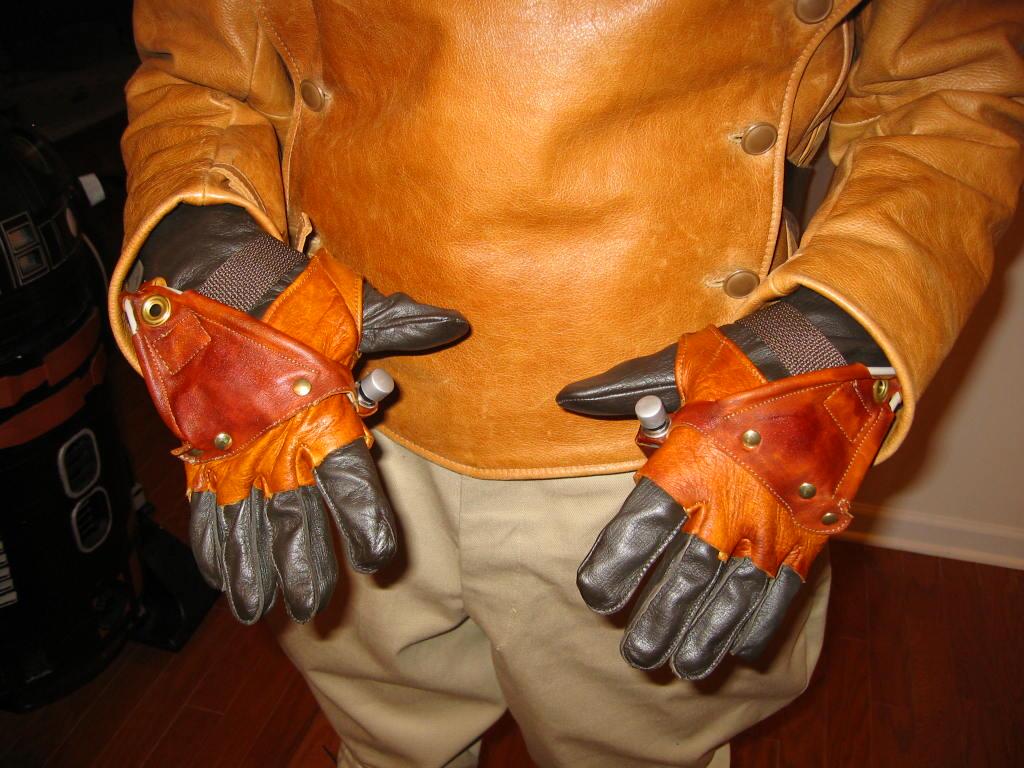
Well, it's been a while since I updated this, but I've been busy, I swear! First, I worked on the gloves. Here's a shot of what I have so far:

The base glove is the brown one. Cliff wears the control gauntlets over the brown gloves. The control gauntlets are made of Deerskin Roper gloves from David Morgan. I just cut them down to the right size. Don't forget to get them large enough to wear over the brown gloves...I usually wear a 7.5, and got a size 10 and they seem pretty good. I got some leather from tandy leather and made the other leather bits, and the wire is speaker wire. I plan to add a button to match Cliff's button (it seems to be a painted Radio Shack button) and use that button to control the fan in the jetpack.
The brown glove is the HAU 6/P
glove in brown from either
Hawkeye
or
ArmyNavy.
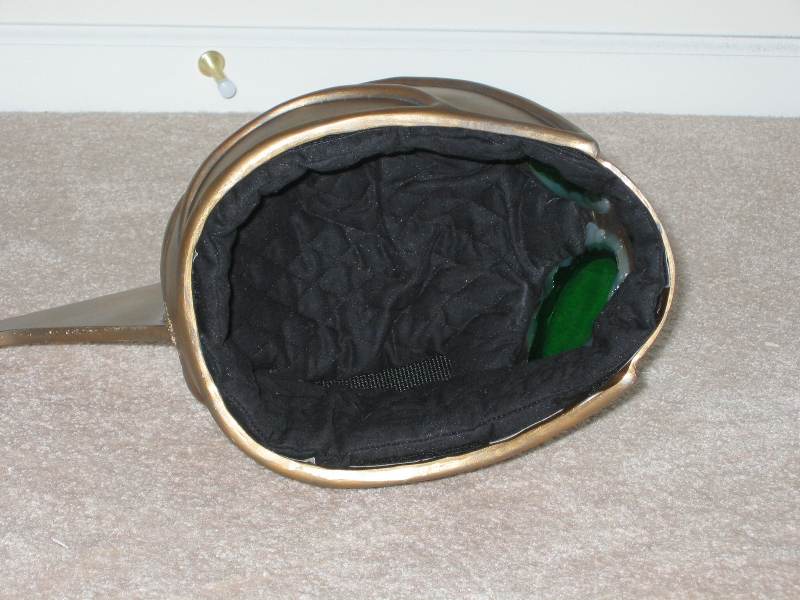
Like the helmet liner? IrishJedi made it, and it is AMAZING. It really gives the helmet a beautiful finish. Now I'm just trying to decide if I want the chinstrap or not.
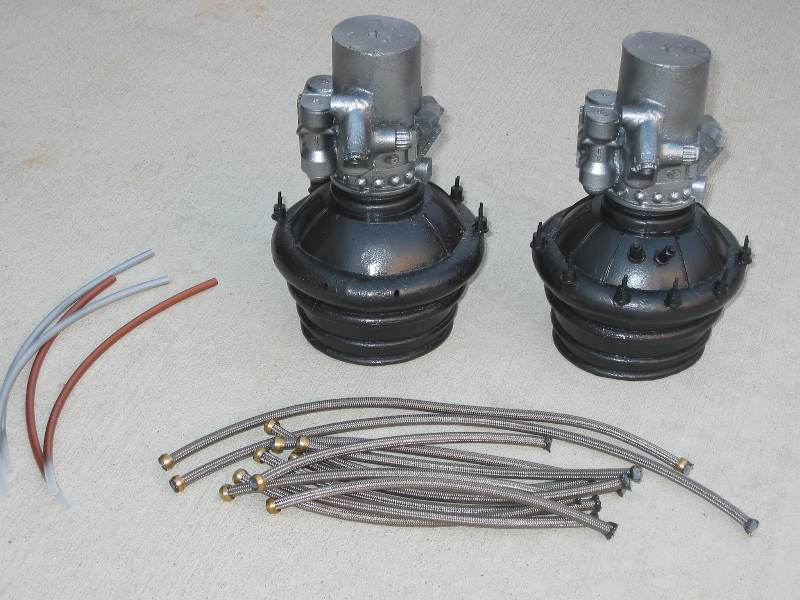
I got the braided hose from Paragon Performance - I ended up using part number PP1167-04 which is 1/4 inch. I think 5/16 inches is the accurate one, but they were out so I settled for 1/4. The 5/16 compression fittings I had still wouldn't fit, even though the hose was smaller. It looked like theoretically they could fit, but I could never get them on. I finally used one size larger fittings, part number 50915K615 from McMaster Carr. Not as nice...but I was able to get them on. Note that the hose is HARD to cut. When it cuts, the ends fray out. I found that a high-speed dremel with a good cutting tool worked. Interestingly my battery dremel never did a good job. The plug-in dremel seems to be faster and was better. Another tip - slide the fitting on the end that was cut at Paragon Performance before you cut a piece off. Then slide it down to the end of the hose you cut off, and it'll be on there. But I couldn't even do THAT with the 5/16 fitting, so I had to settle for the larger fitting.
One piece of hose isn't on yet...that piece snakes around a bit and I'm going to cop an idea from Steve Kareiva and put some wire in it to make it hold the shape. That'll be in the next day or so.
The brass and silver tube is plastic tubing. The brass paint flaked off a bit when I put the tube on much to my annoyance. Gonna have to fix that.
So lots of little bits...nothing really exciting although the engines are starting to look good. Gonna have to mount those soon...
Wednesday, July 28
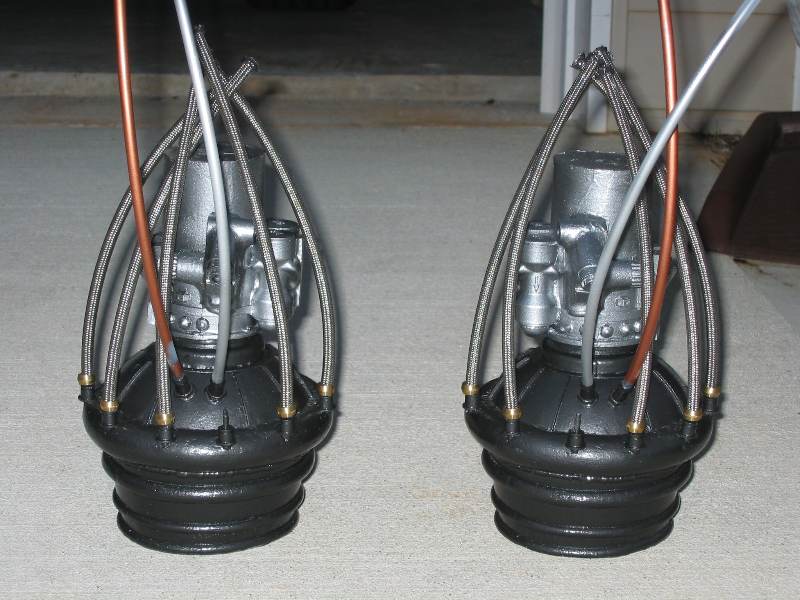
More engine work. I got the last braided hose on. It sort of curls around a bit. So, stealing another of Steve Kareiva's excellent ideas, I got some copper wire that was as thick as I could slide into the hose. With that inside I could bend the hose properly and it kept the shape. I cemented everything in place.
I am working on hand-painting the brass hose to fix up the bits that flaked off...got some base of black down, I'll post a picture once I get some brass paint and finish that.
Thursday, July 29

Yay! The engines are finished! The last hose is in place and the paint has been touched up. I'm all excited.
Later that night...
I got this far...I couldn't stop. I've been working all evening...and it's done except for one little tiny thing...see if you can spot it before you read the text below the pictures.
Man...ever watch Futurama? There's an episode where Fry comes into billions of dollars. He hyperventilates a few seconds, then collapses into a faint.
That's sort of how I feel. This is a year of work...and it's almost done...the costume needs a few more weeks, but the pack itself is almost done.
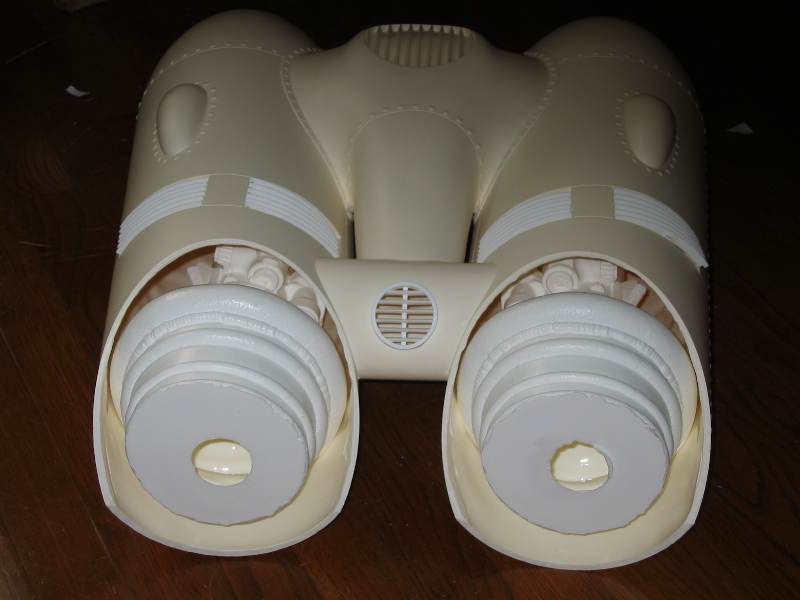
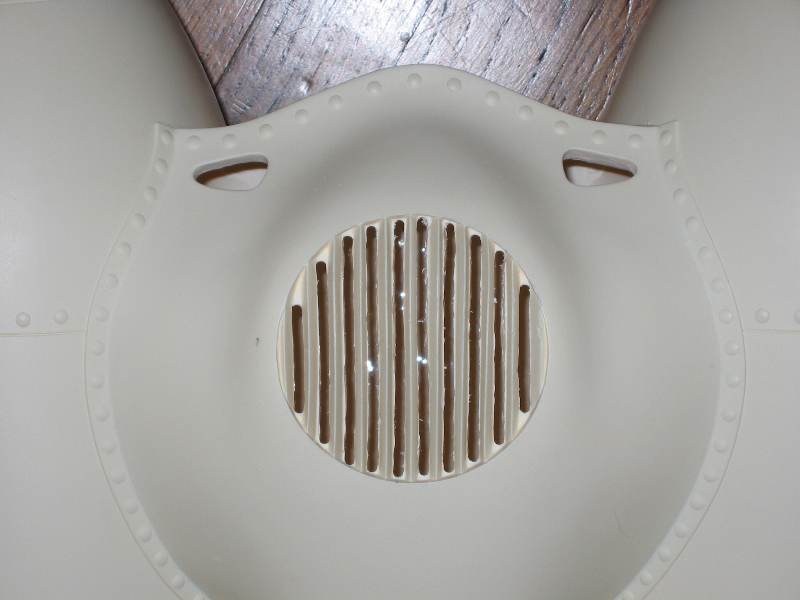
All that's left...take a look at the radiator grill (top, between the cones.) Just below it and to each side is a small opening. There's supposed to be a mesh inside, covering that opening. I have mesh, I've painted it to match the pack...but when I held it up, it was much too fine. It needs to be much thicker. So ... I need more mesh. That's it...that's all that's left. The pack and harness are done!
And yes, the fan spins. There's a wire coming out of the back of the pack, if you put electricity to it (a 9-volt battery is the plan) the fan spins up. That will be wired to my right control glove.
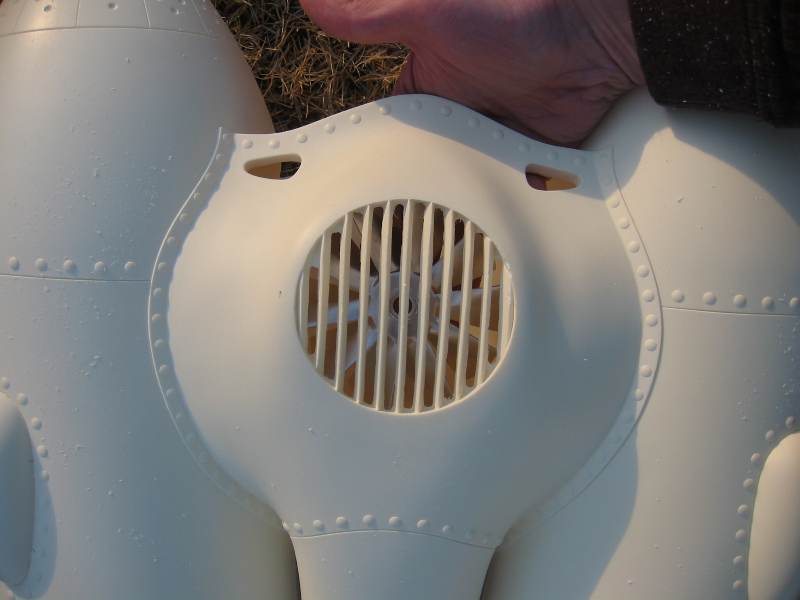
Here's a shot looking inside, with the radiator removed...
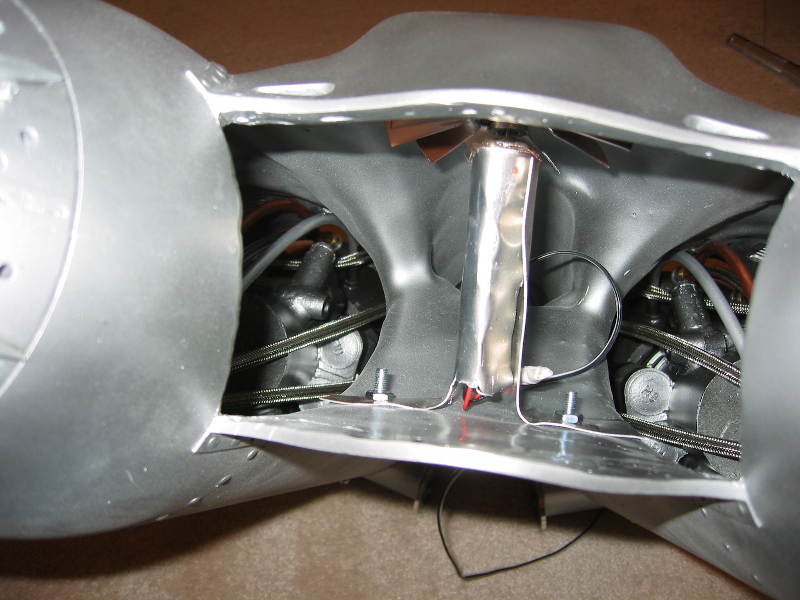
Oh, and you can just see top center of the pack (in the picture of the almost-finished pack) - the radiator is to be held on by two screws, one front and center and one in the back. The screws aren't in, although the holes are ready. I just didn't want to screw it in knowing I'd have to take it right back out to put the mesh in. I also painted the screw heads chrome to match the pack so they wouldn't stand out.
What else...the engines were a PAIN to put in. They were a tight fit now that everything is painted, and finding and matching up the holes was quite difficult. Then I went to attach the harness and the engines were in the way...so I took out all but one screw and that let me move the engines just enough that I could bolt the harness on (with some difficulty, but hey!)
I'm so happy.
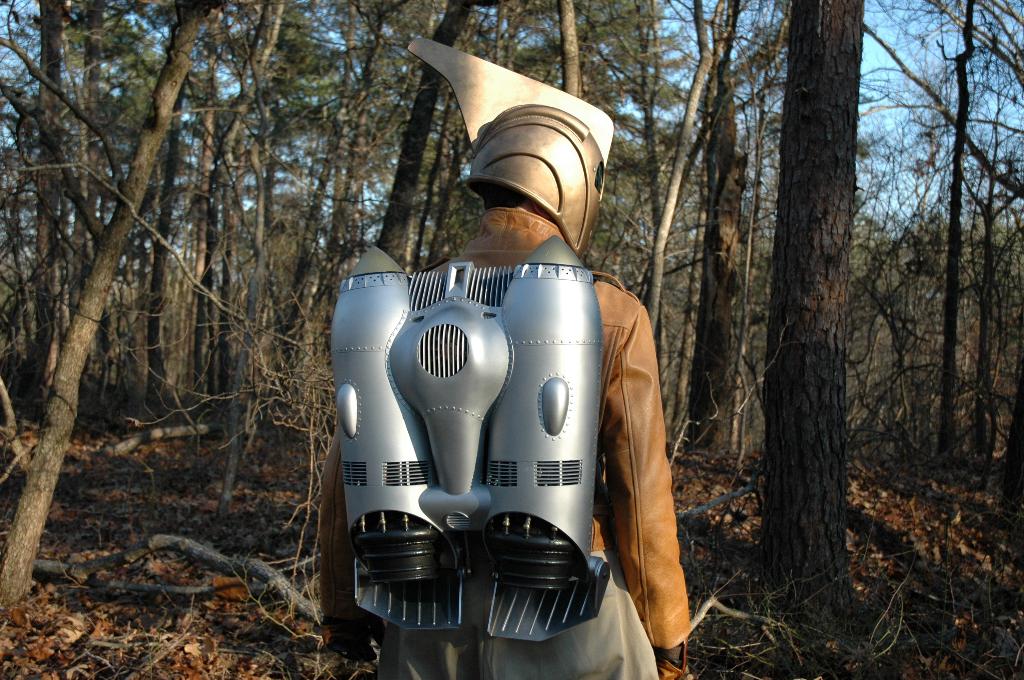
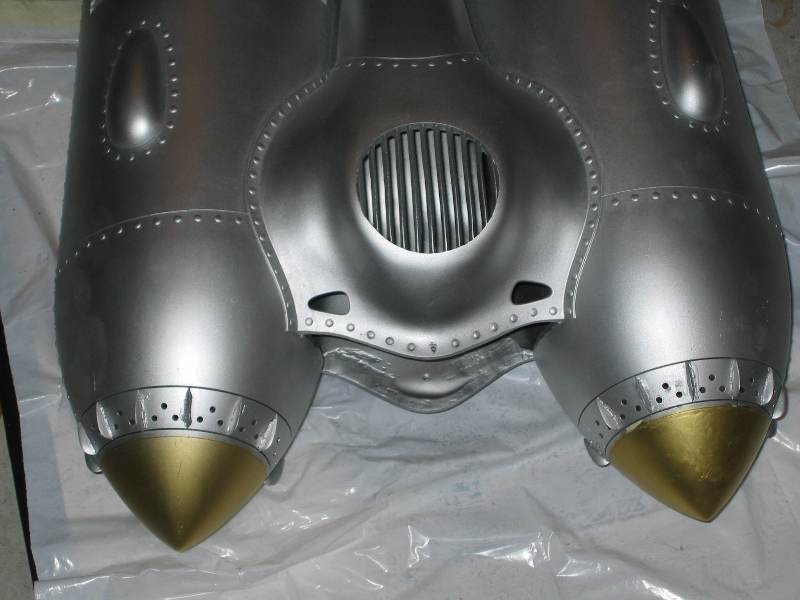
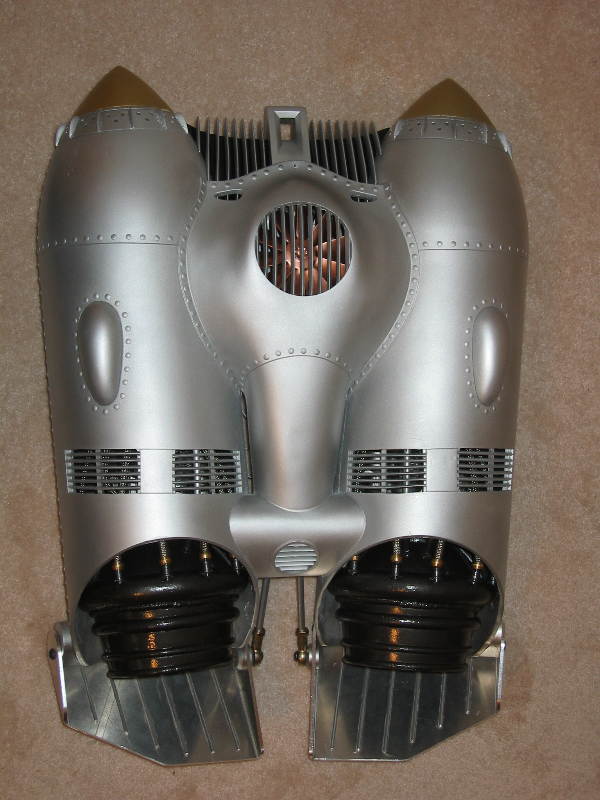
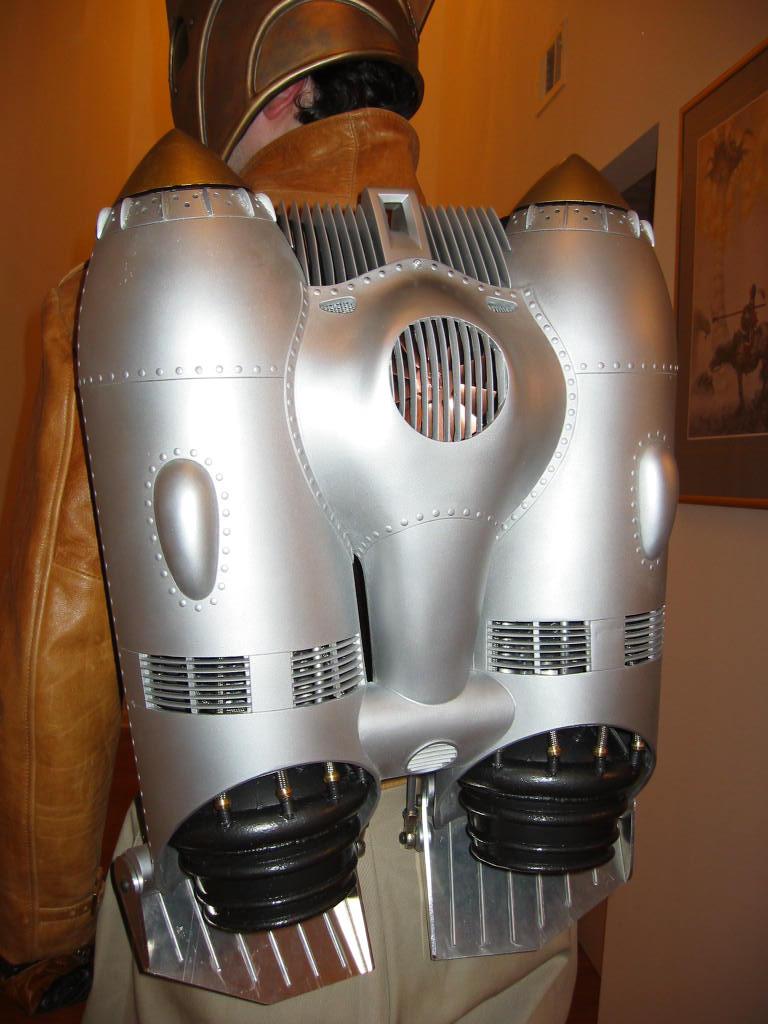
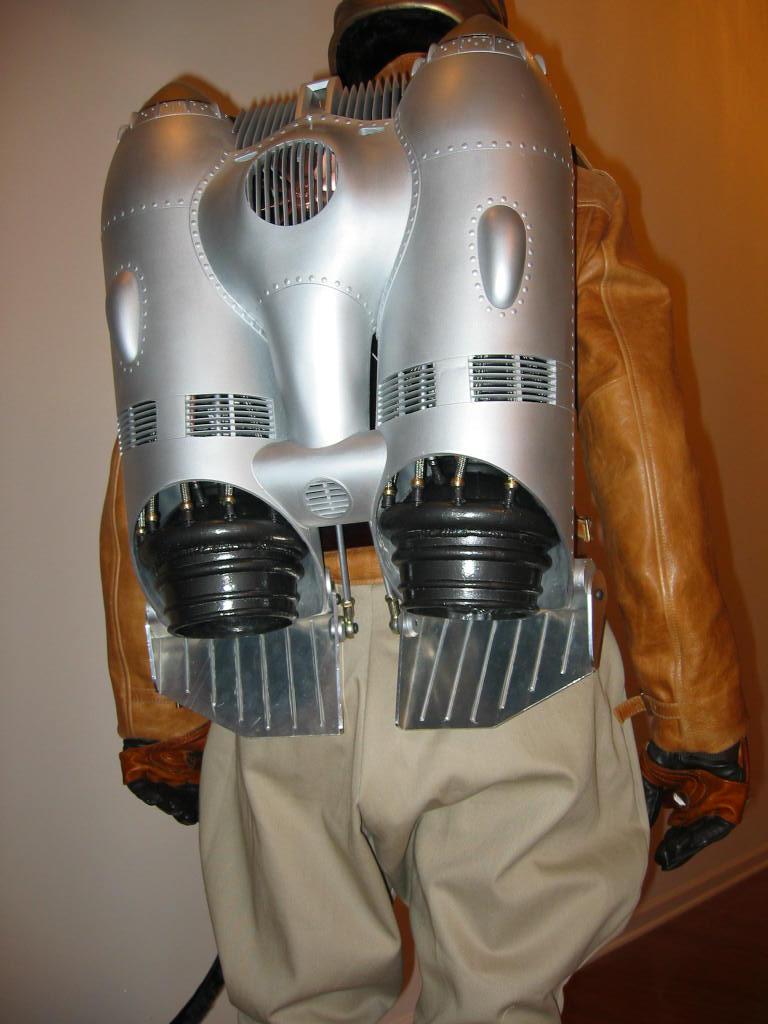
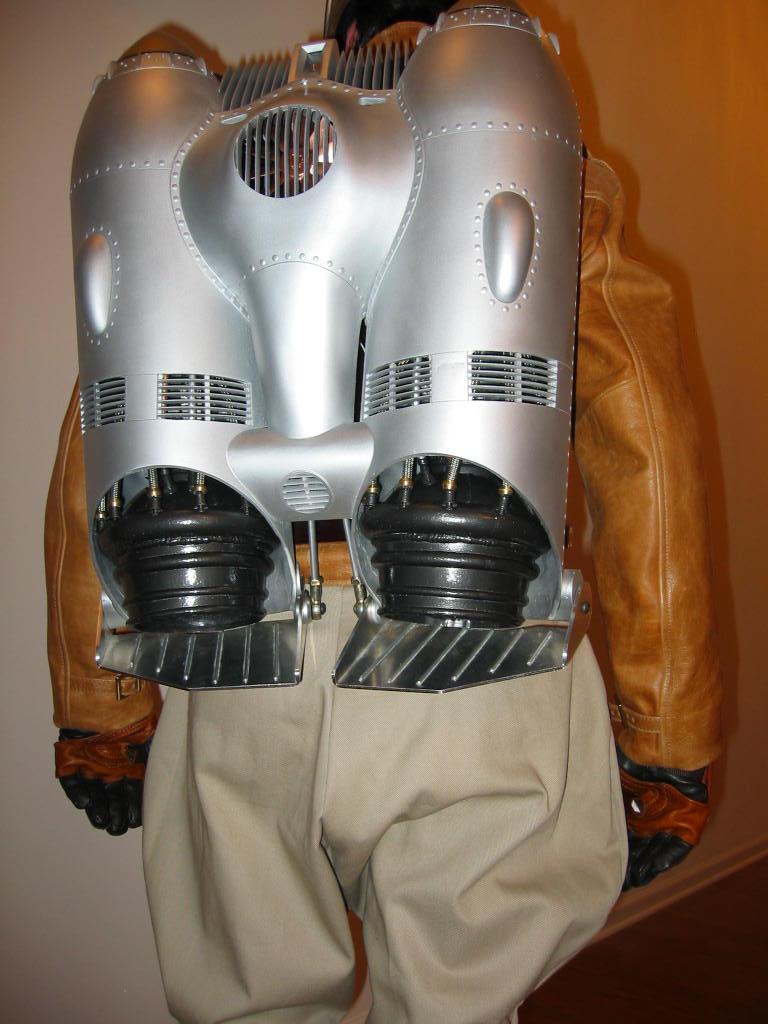
First, a picture of the finished pack...
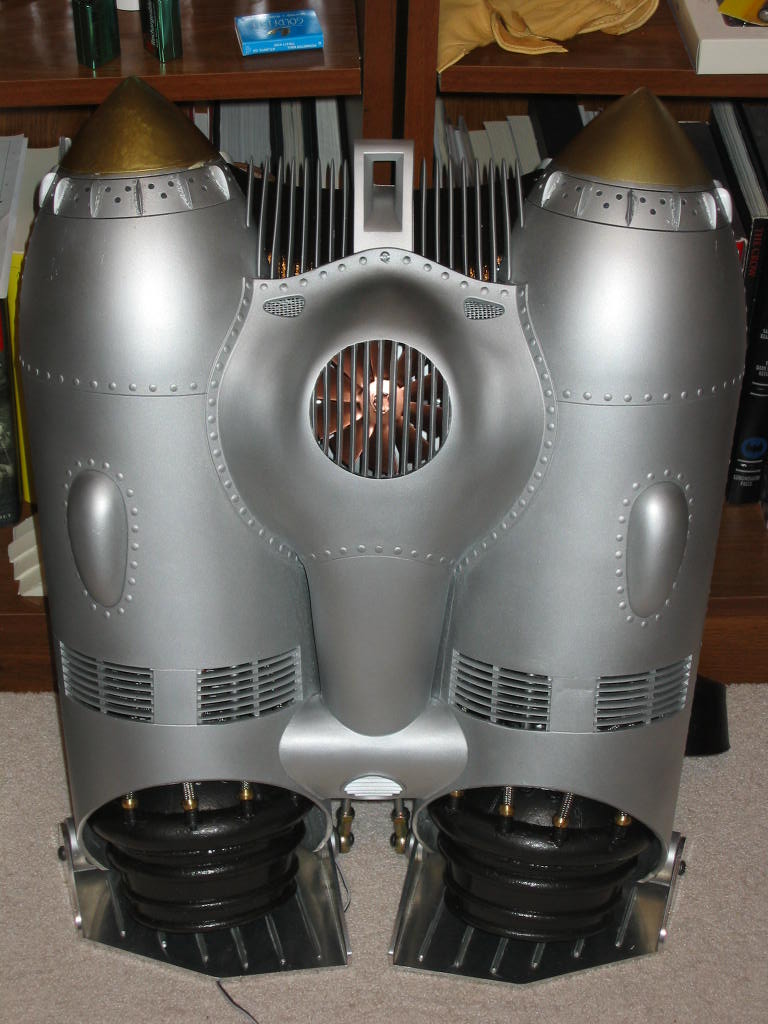
Oooo I'm delighted! Note the cable coming out the bottom...that's the power cable for the fan. That'll be tucked out of sight into the jacket. It will hook to the control glove. Speaking of the control gloves...
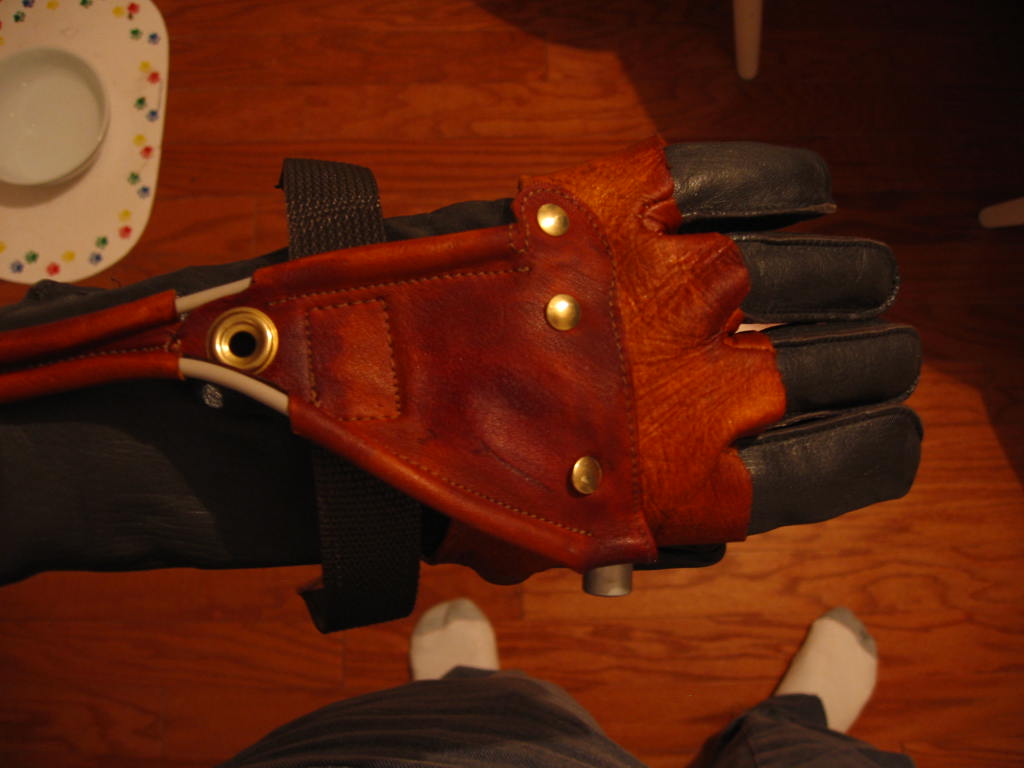
Ignore my feet. Whatta photographer, eh? :-) Almost done...and for someone that didn't have the faintest idea how I was going to do the gloves, I'm pretty pleased. I just sort of eyeballed the pattern for the back plate and cut out a few until it looked right, then dyed it all light brown and riveted them in place. The button (from Radio Shack) has been wired in place, and you can just see a headphone wire at the juncture of the two leather pieces - that was the wire that looked closest to me. The right glove has the button actively soldered to the wire, so that pressing the button will turn on the fan.
What's left is attaching the battery, sewing velcro to the straps, and fastening the leather flaps down around the bottom of the button. So another evening or two of work...just depends on how it all goes. Oh, and I gotta get a plug for the wire - there's a hole in the jacket for the stunt harness. My plan is to feed the wire from the jetpack through that hole and plug it into the wire from the glove. So I just have to get a plug that will work for that ... not sure exactly what yet, have to go see what's at Radio Shack!
Tuesday, August 17
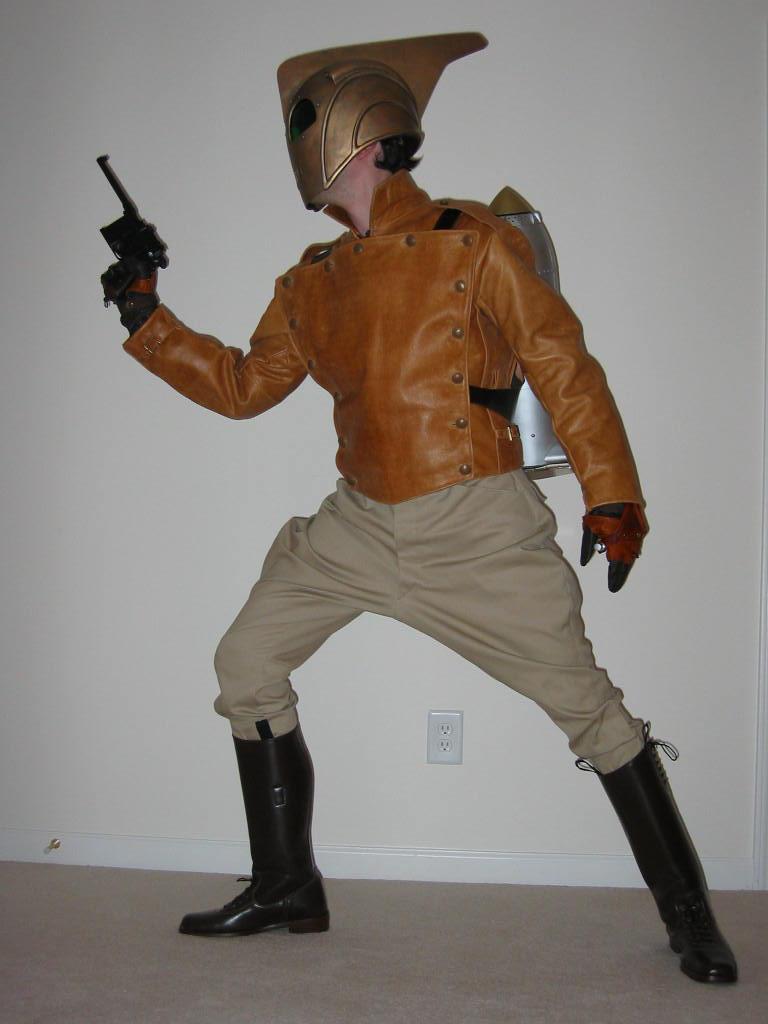
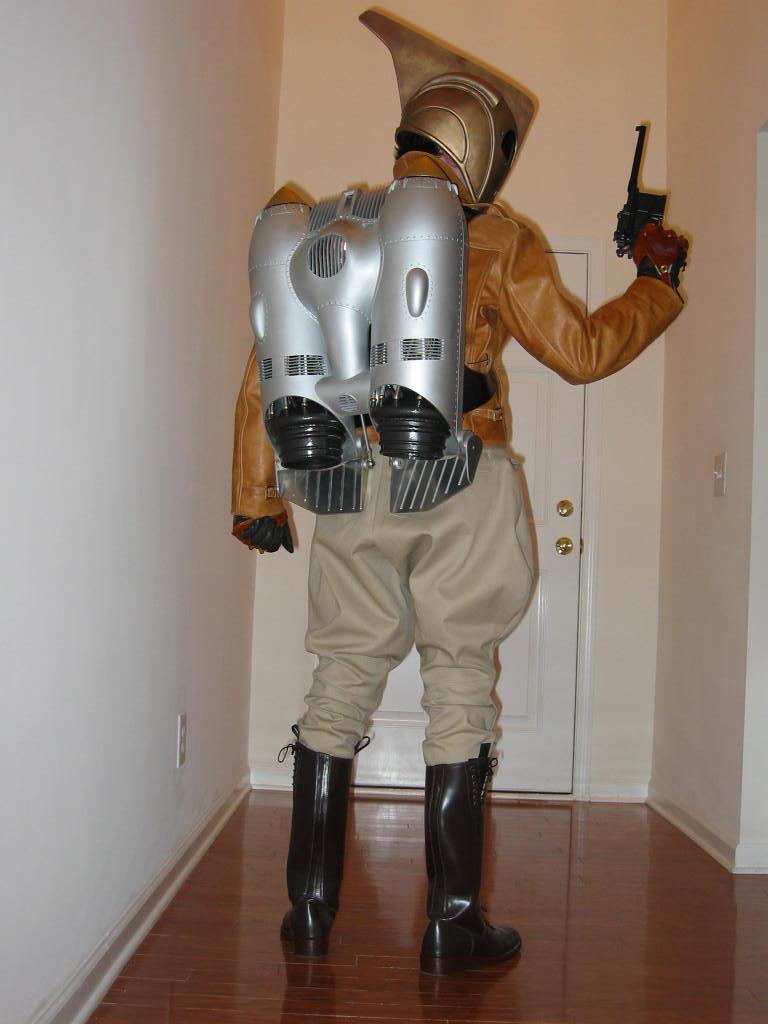
FINISHED!
I lined the jetpack harness with Suede so it wouldn't rub spots into the jacket and also painted the black stripe around the nosecones. And ...oh man am I happy.
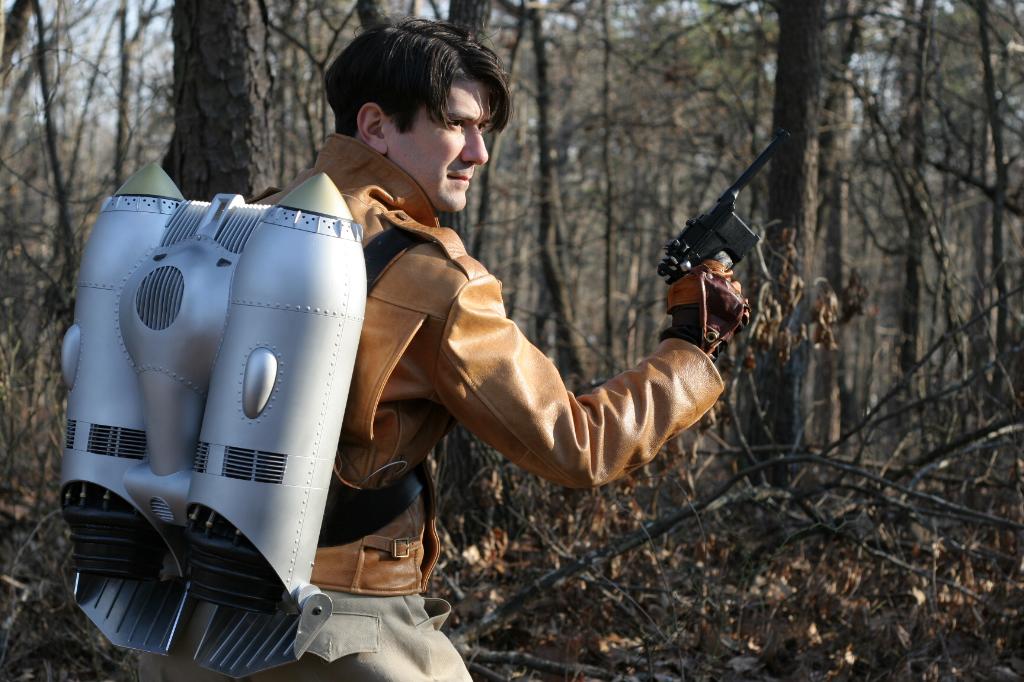
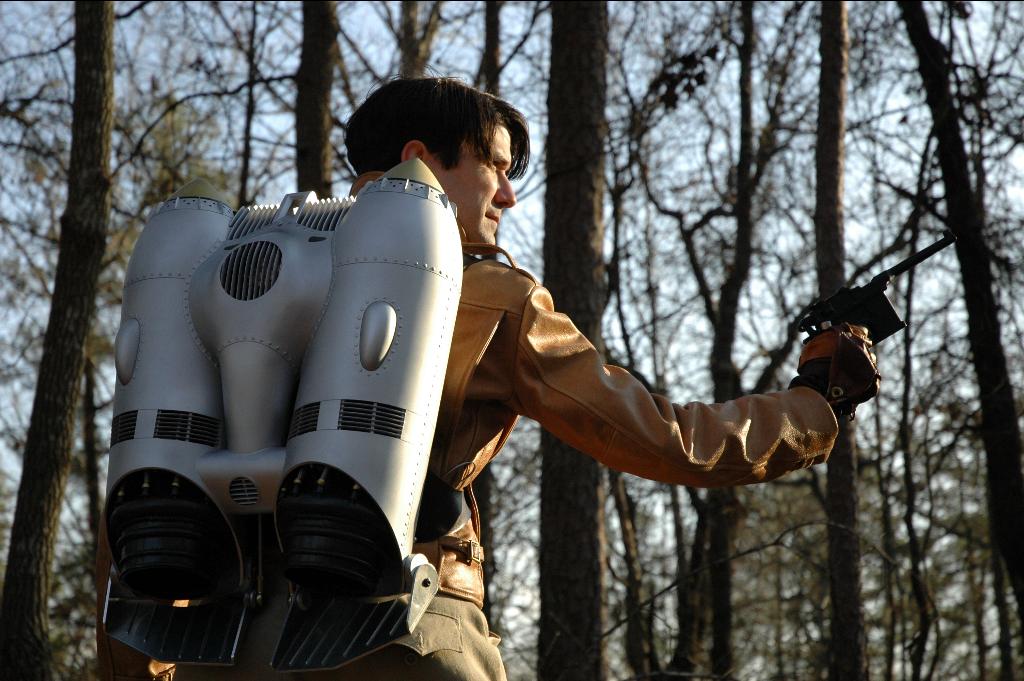
So here's me posing and being all Rocketeer-y...

Dang it! Why won't this thing take off!
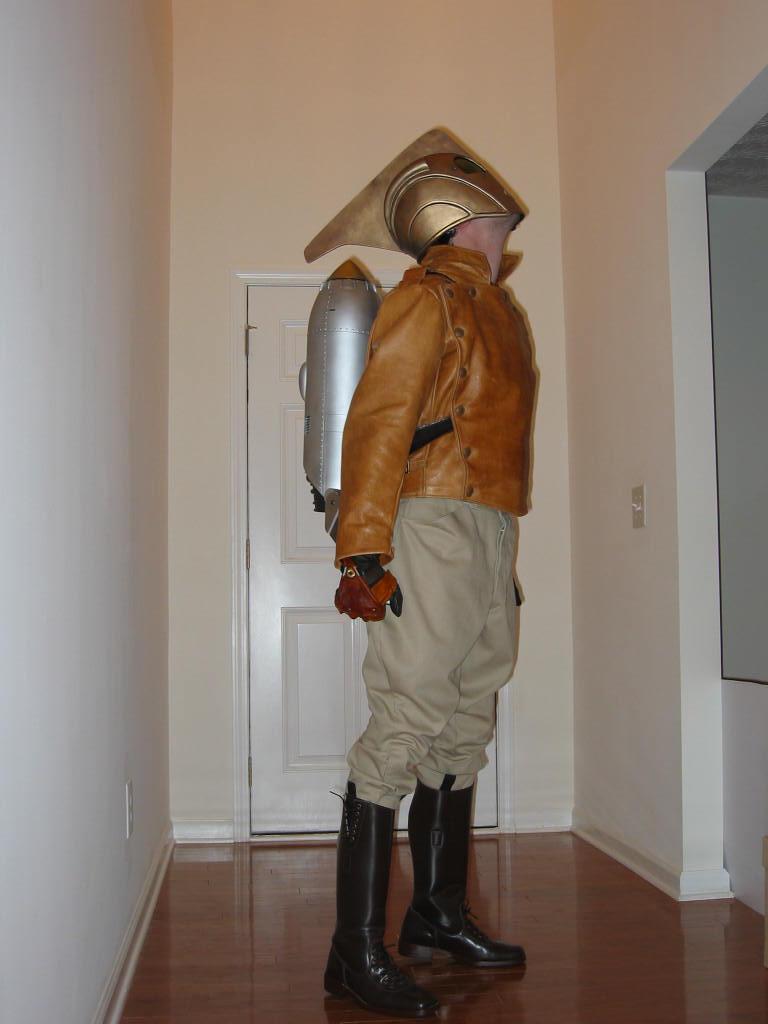
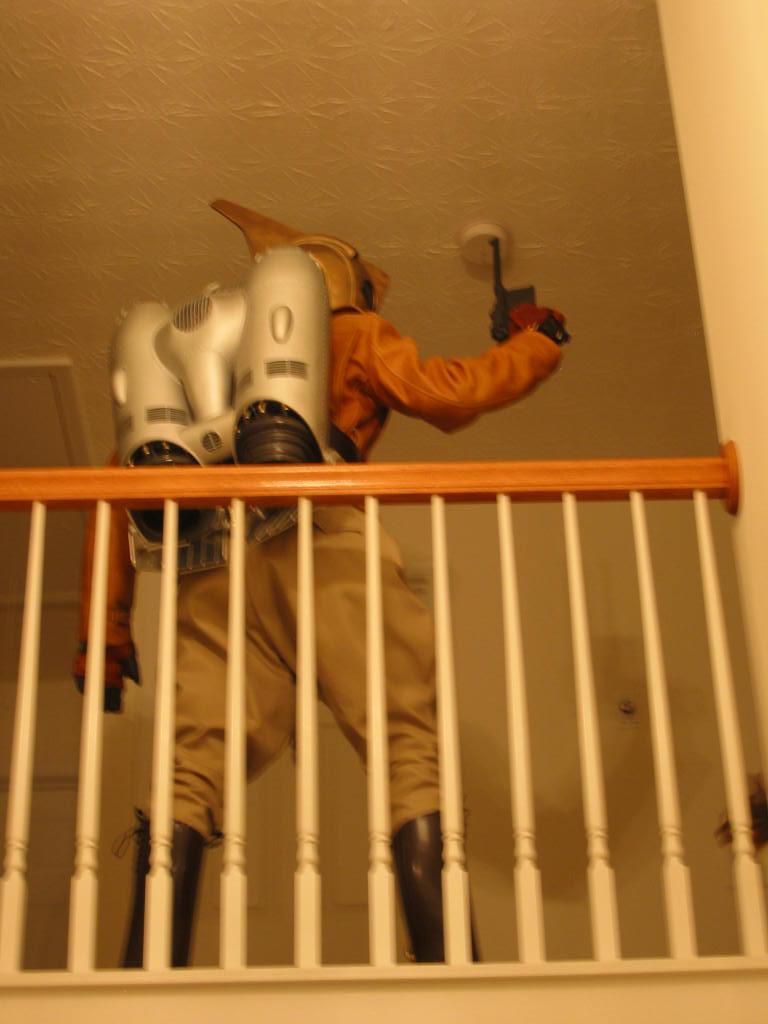
More posing and some shots of the jetpack...I can't believe I worked on that for a YEAR.
Look! The flaps move!
and here's a few detail shots...
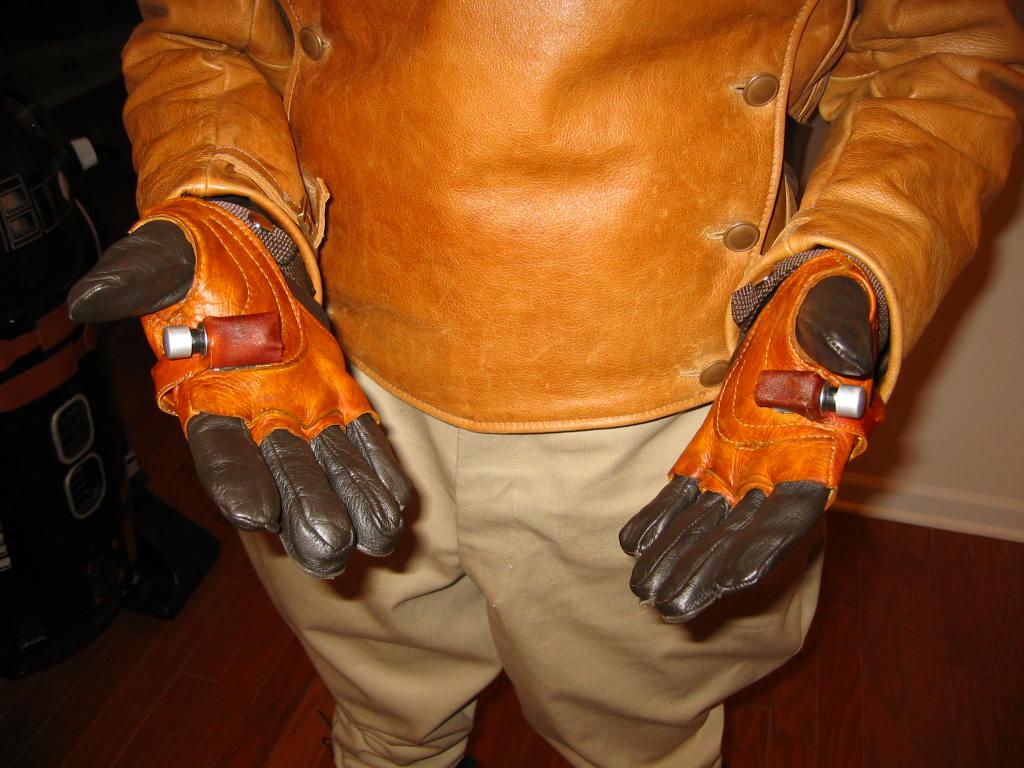
The right button controls the fan.
Here's some pictures we took in January, 2005. I'm actually really proud of this pack and costume...so bear with my shameless showing off!
Trip Ross did the picture below for me...this is just TOO cool!
