by Evan Reynolds, TK830 of the Georgia Garrison of the 501st
This is a tutorial about how to make a neato-keen blaster. I would like to credit Jimmy Burns for some of these ideas, especially the laser pointer bit. I changed it a bit, but it was his that made me do mine.
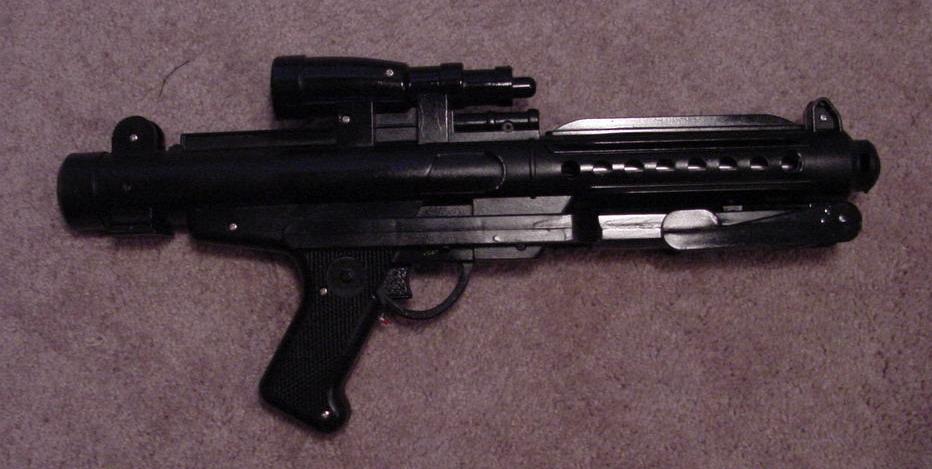
This is basically a dressed up Kenner blaster with several extra features. The barrel lights up when you squeeze the trigger (and the Kenner firing sound still activates.) It has a folding stock, and there is a laser pointer wired to a button in the handle that gives you a laser sight. A few folks asked me how I did it, so here's a tutorial which I hope some find useful.
Soldering is not really very hard. But since several of the things in here involve soldering I figured I'd better mention it. You will need a soldering iron. You can get one at RadioShack or a similar place for $20 or so. Also pick up some solder - it looks like metal wire.
All you really do is plug in the soldering iron and let it heat up. Take the two wire ends you want to connect and twist them together. The take the soldering iron and touch it to the solder. It will melt. If you touch the solder right above the wires it will melt onto the wires. Then let it cool, and the wires will be soldered together. You can also get some molder solder onto the iron and then wipe it onto the wires. It's very simple, get a iron and try it on some test pieces of wire and you'll find out that it's just not very difficult.
Make sure you have a good surface under the iron to catch drips of molten solder. I use a metal cookie tin to hold all my electronic goodies, and use the metal lid to catch any drips. It works well.
First unscrew every screw you can find in the blaster. Stick them in a Ziploc bag or somewhere safe.
The blaster has two sides which will still be connected in three places. The tip of the barrel has a nose that holds the barrel together. The scope has two caps that connect the sides, and the trigger guard seems glued or welded.
The nose on the barrel is easiest, or at least it is if you have a dremel tool. Use a cutting wheel to cut off the nose piece, then use a sanding tip to sand it smooth. The nose is just a little orange cap on the blaster, it looks better gone and it's much easier to just cut it off. If you don't have a dremel tool, then cut it off with an X-Acto knife.
Next comes the scope. This just takes time. Look at the gun and see where it splits in two. Now take the X-Acto knife and cut the caps on the scope in the same place. I started with the top of the cap and scored a line. Then just keep scoring it until the knife cuts through. Then do that on the front of the caps, then wedge the scope open a bit and do the bottom from inside the scope. The bottom is the hardest, just do the best you can.
Go slowly and be careful that you don't cut yourself. It'll take time.
Finally, once that is done, the trigger guard and handle will stick. I used a combination of a screwdriver and the knife to open them up. Use the screwdriver to wedge the opening and try to widen it. Once it's as wide as you can get it, cut with the knife. Just score repeatedly like you did with the scope, or wedge the knife in there and see if you can split the seam open a bit further.
There's no really good way to do all this cutting open of the scope and handle, just be slow and careful!

Once you've got the gun open, remove the two gray inserts that cover the insides of the holes in the barrel and throw them away. Note that there are two wires, one red and one black, running to a LED light in the tip of the gun. Now you've got lots of choices.
The two wires are power (red) and ground (black). They can really power any lights you care to put in the barrel. I took a droid blaster and cut it open. Then remove the light-up tube in the droid blaster. I cut the LED off the Stormtrooper blaster, cut the wires to a appropriate length, and soldered the red Stormtrooper wire to one wire in the Droid blaster and the black wire to the other. (Make sure you removed the batteries first...) That way when I squeeze the trigger, the droid tube lights up instead of the LED.
One note is to make sure you hold the wires in place and make sure the tube will light before soldering. It really sucks when you solder a wire in place and THEN realize you did the wires backwards. You can either hold the wires by the insulation and touch them to make the connection, or twist them together and test them, or best of all get some test lines from RadioShack. They are quite cheap and just have two alligator clips connected by a wire, all insulated. You can just clip one end to each wire and see if things work.
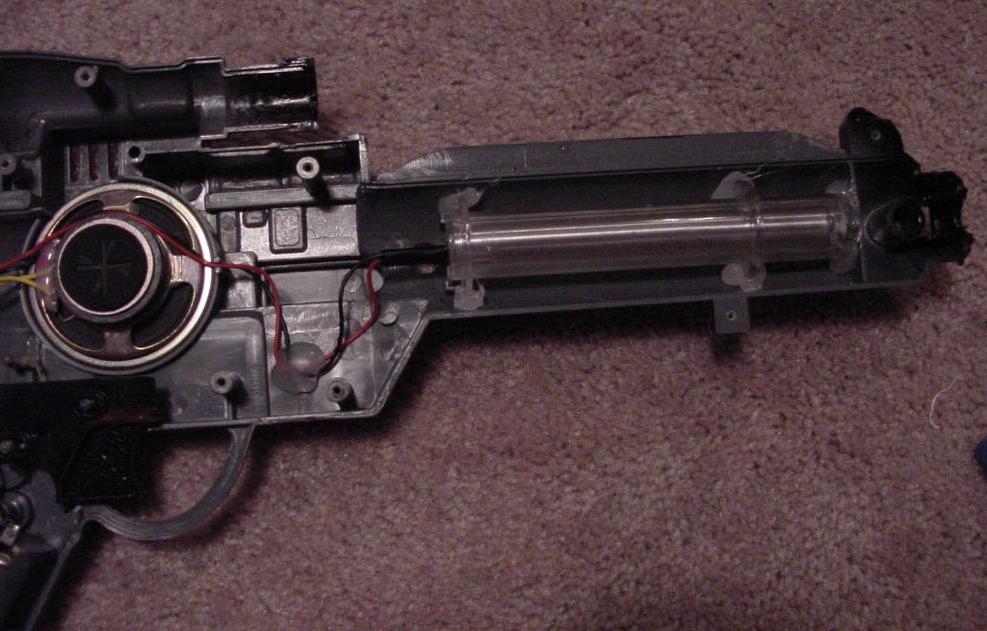
The inside of my Stormtrooper rifle with the Droid Blaster light
Once you have things wired up and they work, wrap some electrical tape around any exposed wire. Make sure electrical tape separates the two leads running into the Droid Blaster lighting tube. If they touch they will short out. That's bad.
Other options...again, you have power and ground, you can power anything you can fit into the barrel. I first put about five bright LEDs in the barrel and taped them out of sight. That works - just keep the two wires running to the LED in the tip intact. Scrape a bare spot in the black and red wire. Then take a LED and wrap one of the wire legs around the black wire and one around the red wire. Now it will light up when you fire the blaster. Try the LED both ways, it'll only light up if the proper wire has power and the other has ground. If you attach several of them, you can make the barrel glow nicely when you squeeze the trigger.
A big thanks to Jimmy Burns on this one, as this was his idea. I ended up connecting it differently, I had the idea from being totally jealous of his blaster.
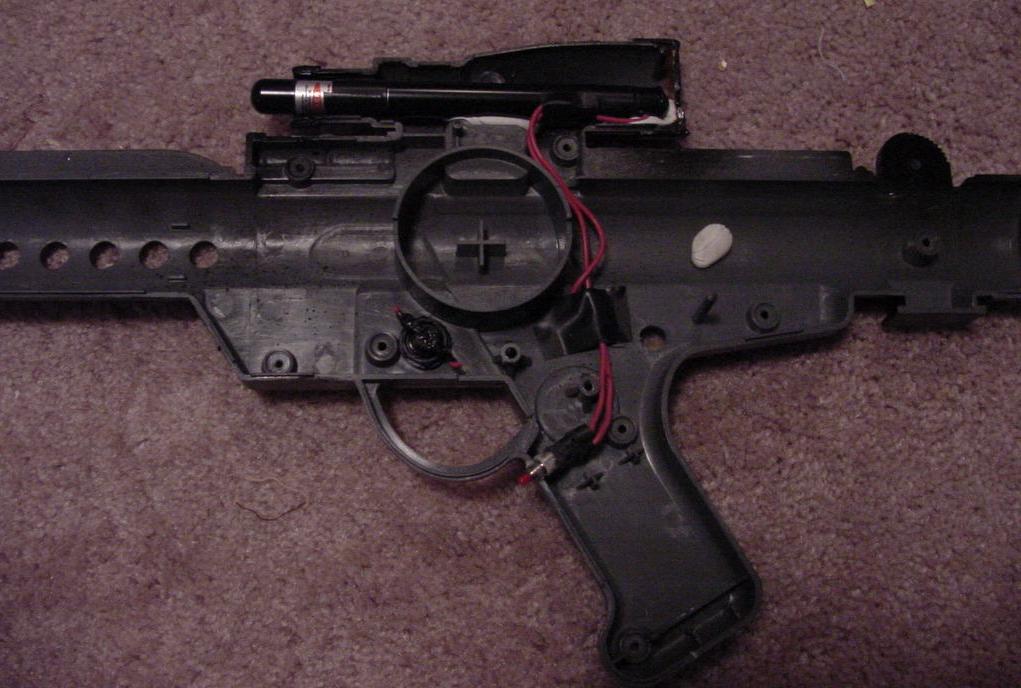
OK, this is the difficult one, although I eventually found a way to make it much easier. Start by looking at the picture above. Note the pen laser pointer in the scope wired to a button in the handle. You can put the button anywhere you want. Just make sure that you can still run the wires in such a way that you can fasten the gun back together, and if you add a folding stock don't put your first button under the stock like I did. That's why there is a button above the trigger that's not connected to anything...
Unscrew the back of the pen laser pointer and take out the batteries.
The laser pointer only works when the button is pushed. So we need to leave that button in a pushed state. Take some electrical tape and TIGHTLY wrap it around the barrel of the pen so that it goes over the button and keeps it pushed down. Wrap it several times so that it'll keep the button pushed.
Now you'll need a dremel tool or an equivalent. First, just scrape a patch of paint off the side of the pointer. This is the ground, as the barrel of the pointer serves as the ground. So we just have to expose a bit of it.
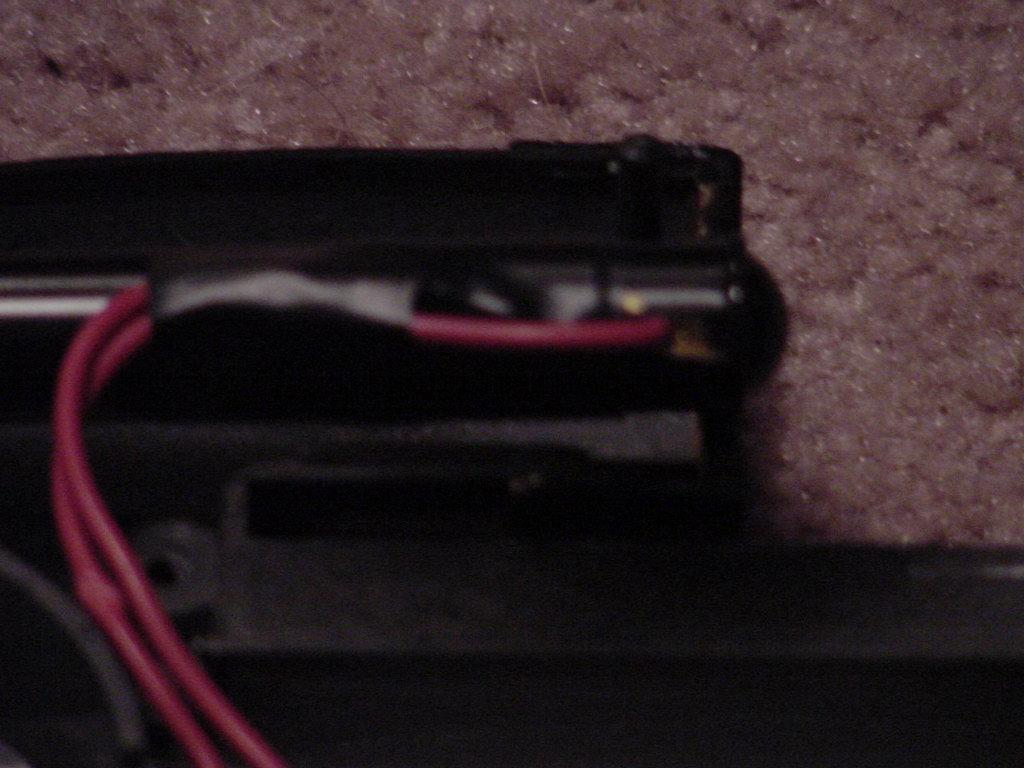
Next, cut a notch in the threaded back of the laser pointer. This notch should be wide enough for a wire, and deep enough so that when you screw the top back on you can put the wire between the top and the batteries. We'll call this the power wire, even though it is still just completing the circuit for the ground I think. The picture below is a bit fuzzy but you can make it out (I hope!)
Now take the top and put a small square of electrical tape on the bottom. This will stop the battery from making contact with the tube of the pen and completing the circuit by itself.
Now, take one of those wires and use electrical tape to hold it to the spot on the barrel you scraped clean, so that the wire is making contact with the metal pen body.
Put the batteries in the laser pointer. Put the other wire on the batteries and in the notch you cut. The idea is that you will screw the cap on, pressing the wire down against the batteries. It may take several tries, and it can be a pain to get the cap on as well. You can always tape the cap in place if needed. But before you do that, press the button and see if you are getting a laser dot. When you are, tape the second wire in place so it won't wiggle around and break the connection.
Now before you do anything else test out the laser pointer. Put the batteries inside and close it up, or since this is just testing you can just tape one wire to the batteries so that it makes contact instead of screwing the cap back on. Now with the wires separated, the laser pointer should be off. If you touch the wires together, the laser pointer should turn on. Make sure that works before you solder in the push button. Take the batteries back out before you start soldering in the button.
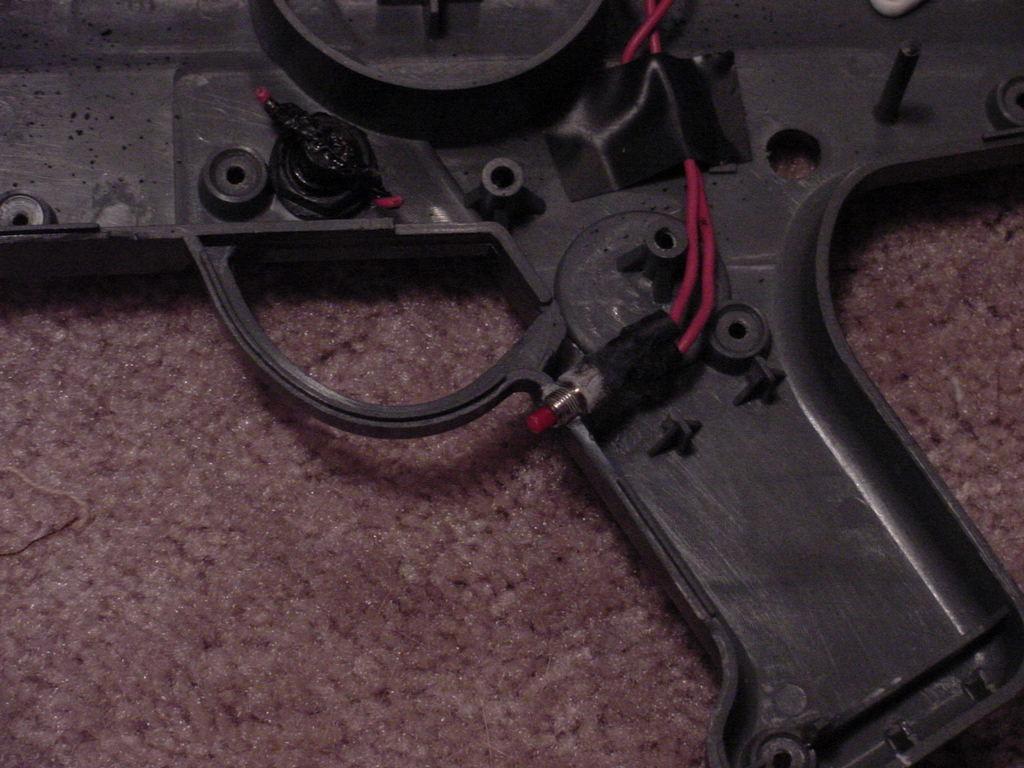
Now you will need a small button from Radioshack. Look for a small "momentary" button with two metal contacts coming out of the bottom. Attach the two wires to the contacts and then put in the batteries. Make sure the laser pointer is off, then push the button and make sure the laser turns on. If the reverse happens, then you have the wrong type of button. Make sure the packaging for the button says it is "normally open". Once you know it works, take the batteries back out and solder two wires to the button, one to each contact. Drill a small hole in the blaster for the button. I closed the blaster and drilled the hole on the seam below the trigger guard, as you can see in the next picture.
All the testing is because it is much easier to find problems after you do a single step. If you do everything and solder in the button and then test you'd better hope it works. If it doesn't, trying to find out which step went wrong is really a pain.
Also note that screwing the cap on with a wire getting held in place is a bit of a pain. It sometimes moves the wire out of position. So watch for that and if it happens just take the cap off, put the wire back, and try again.
Now place the laser pointer in your scope. I got some white tacky stuff (like a non-drying putty) and used that to hold it in place. You can find it in white, yellow or blue from drug stores or Home Depot or the like. Anything to stop the laser pointer from wiggling around. Put the wires in place where you will be able to close the blaster without the wires getting in the way, and tape them down so they'll stay. Test the button again, and if it works you are set!
Battery replacement will be a bit of a pain as you have to take the blaster apart and remove the wire. I tried quite hard to use the batteries in the handle of the gun to power the laser pointer. Unfortunately while it worked, much less power came through and I got a VERY weak dot, not a useable one at all. I suspect the wires bled off some of the electricity, I'm just not sure what the deal was. So I ended up having to do it this way. If you get the batteries in the handle of the blaster to work, please let me know how you did it!
Um, option two is to get a very small black laser pointer and use black electrical tape to tape it to your muzzle somewhere. The black tape should fit right in with the black blaster and it also works pretty well. You just have to spend more time trying to find the button in gloved hands and can't do it one-handed.
I did this pretty simply...I got a '77 Kenner blaster and took the folding stock off that blaster. Note the two holes that are in the '77 blaster to hinge the folding stock. In the new blaster, those same holes are there, but have little molded screw heads instead of holes. I just drilled out those screw heads. Then push the hinge pins on the folding stock into those holes. It'll make sense if you have a '77 blaster.
Be careful you don't drill the holes too large or the stock will keep falling out. Drill too small and try to get the stock mounted. If you can't get the hinge pins in, then drill a bit larger. Better to do that step a few times over than to drill too large and regret it. Also note that you can use the holes in the '77 blaster to size your drill bit.
Once done, put the blaster out, still in two pieces, and cover up any exposed parts such as the lights in the barrel. Then spray paint it black. I used Rustoleum Enamel gloss black (I like glossy and shiny.) Flat black is also good, take your pick. The Rusoleum Enamel paint is really tough and will wear well. I hit it with a Rustoleum clearcoat as well. That's all I did - the text is still visible but realistically no one will ever see it.
If you want, paint it silver and then cover the silver with a coat of black. As the black wears, silver will show and it will look like it's wearing down to metal. You can even get some very fine grit sandpaper and rub down the corners to give it that "used" look before you clearcoat it.